← blog · June 17, 2023 · 3 min read
6.5 Inch Speaker Adapter for Nissan 200sx
A debrief on my progress to develop an adapter to correctly install 6.5 Inch Speakers on my Nissan 200SX from 1989.
$ bloat--level 3Bloatin'
Introduction
When I decided to upgrade the audio system in my shitbox 1989 Nissan 200SX, I wanted to install new JBL 6.5-inch speakers on the front doors to pair with my new Pioneer dual-din touch screen radio (SPH-DA160DAB). The stock speakers were old and small, so I embarked on a quest to find a suitable solution.
After extensive research and exploring different approaches, I wanted to create a 3D printed piece to imitate the original plastic trim that holds the speaker, however I eventually arrived at the simple DIY solution using MDF (Medium-Density Fiberboard) and some basic tools with a touch of paint, because only I will see the inside of the door and it has to look pretty for me, right?
In this article, I will share my progress, the solutions I discovered online, and my approach to developing this adapter.
Research
My journey began with thorough research into the speaker installation process for the Nissan 200SX.
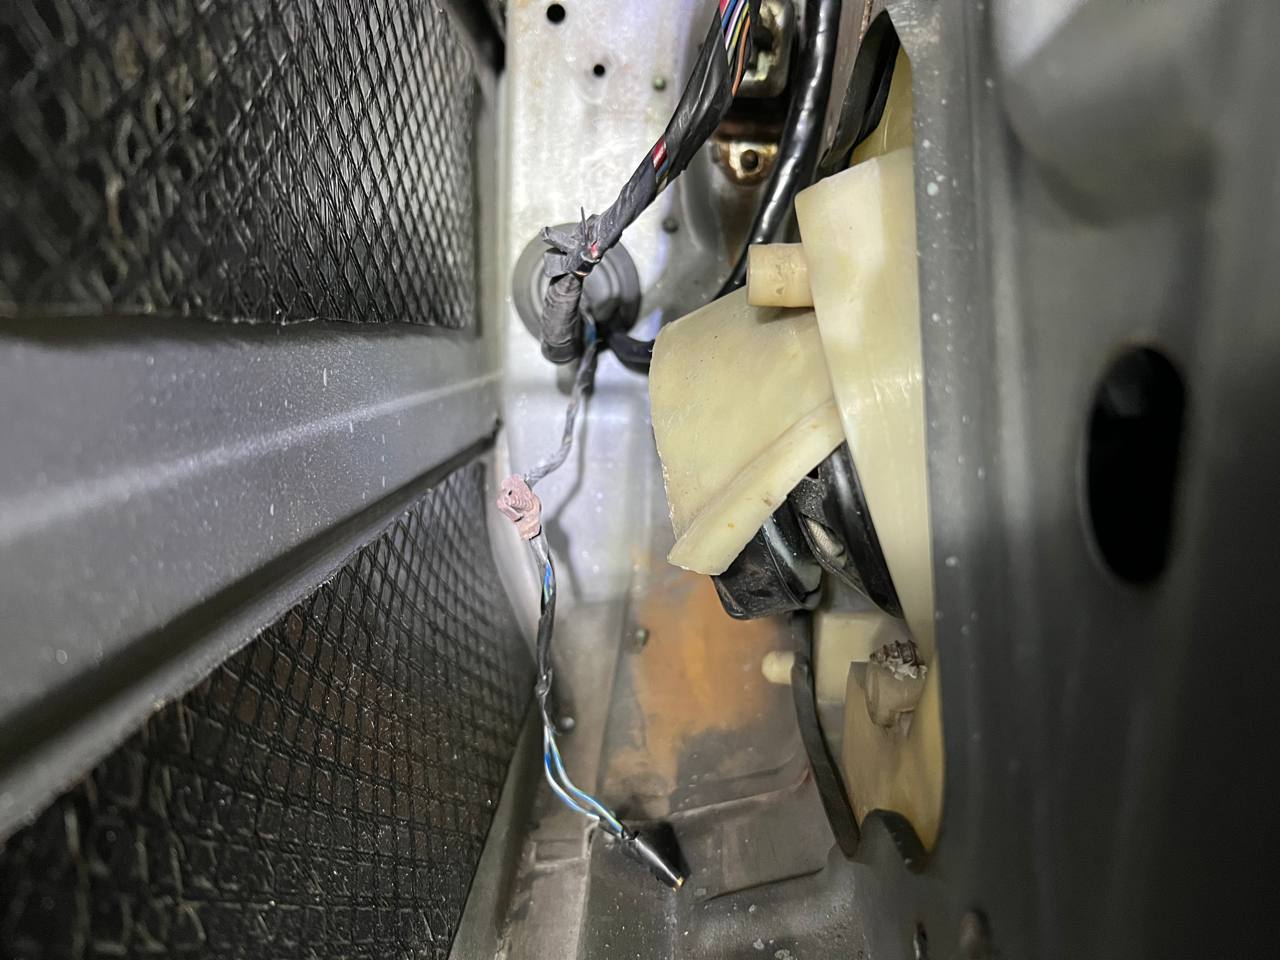
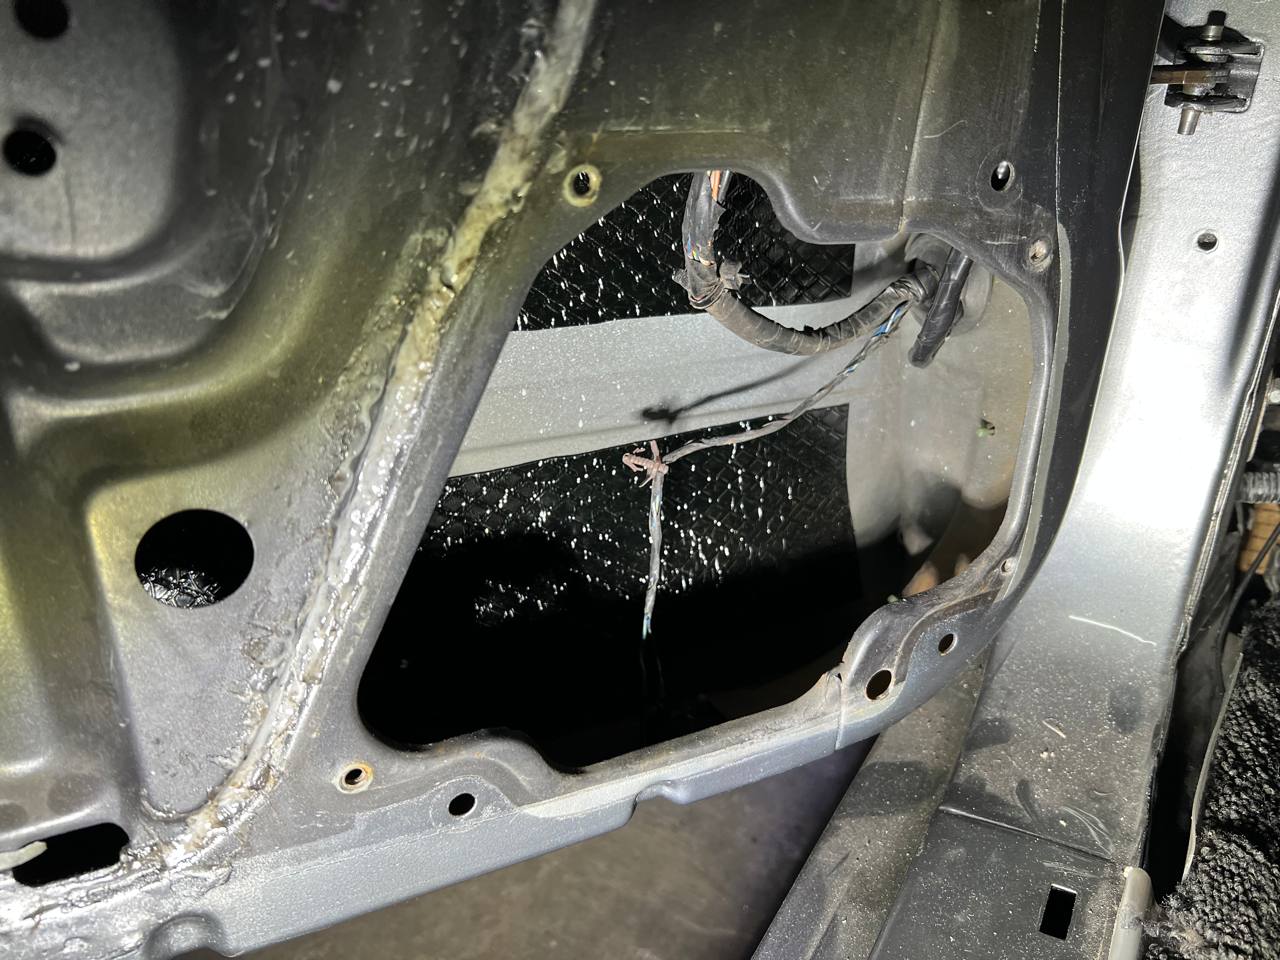
I wanted to find and easy solution, something I could print right off and it would be plug and play, obviously this was not the case, there was nothing available online similar to what I wanted. I did came across several off-the-shelf adapters that didn’t tilt the speaker to the seat, but they either came from the other side of the world, which would cost a lot on shipping, or they were already stupidly expensive. It became clear that I would have to build something.
3D-Printed Adapter
My initial plan was to design and 3D print an adapter that would precisely fit the dimensions of the new speakers and cleanly replace the old plastic trim in the door panel.
Something off Thingiverse?
First I found this 6.5 Inch adapter on Thingiverse, and I went to print it on my Ender 3:
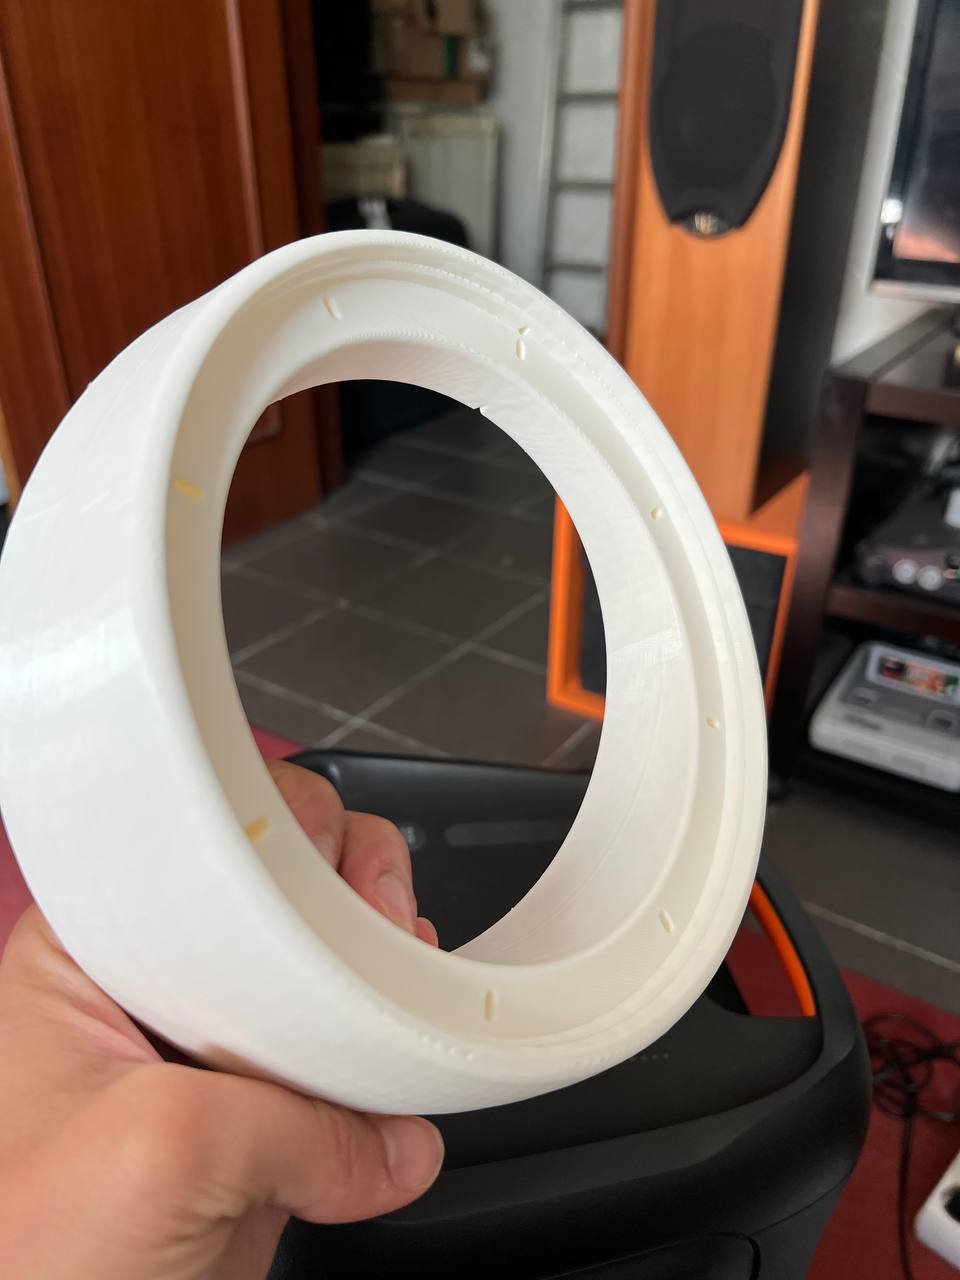
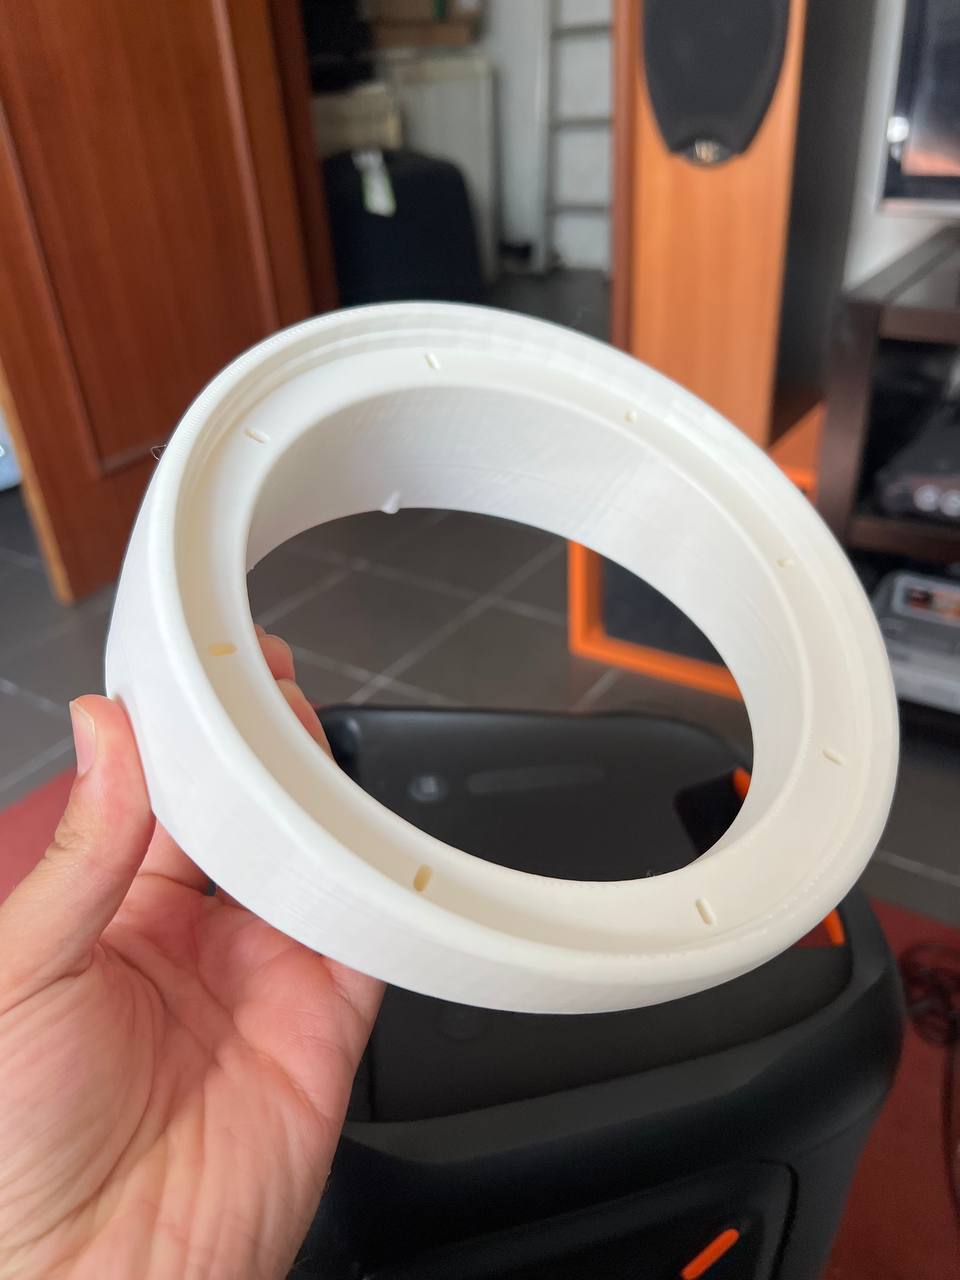
It’s round, it looks nice, so I thought, maybe I can just mix this with an MDF base, but I would soon find out it would not fit, as the speaker would hit the door card.
Back to the drawing board
This time, I needed help, someone with a mechanical background who could actually help me design from 0. So I reached out to my cousin, Pedro Castro, who actually knows what he is doing.
We took all measurements of the original piece, the door hole and the speakers and got to work.
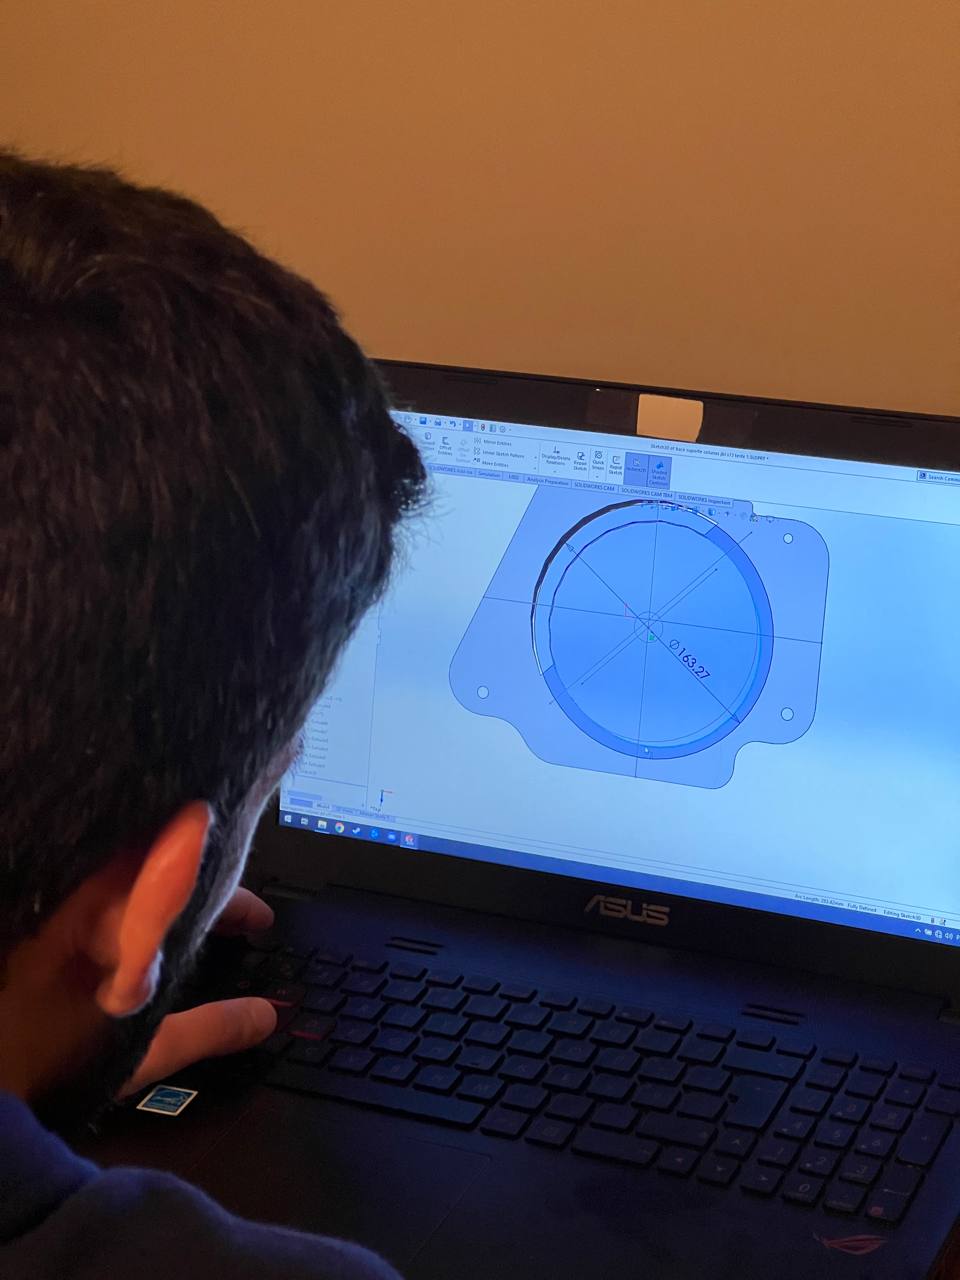
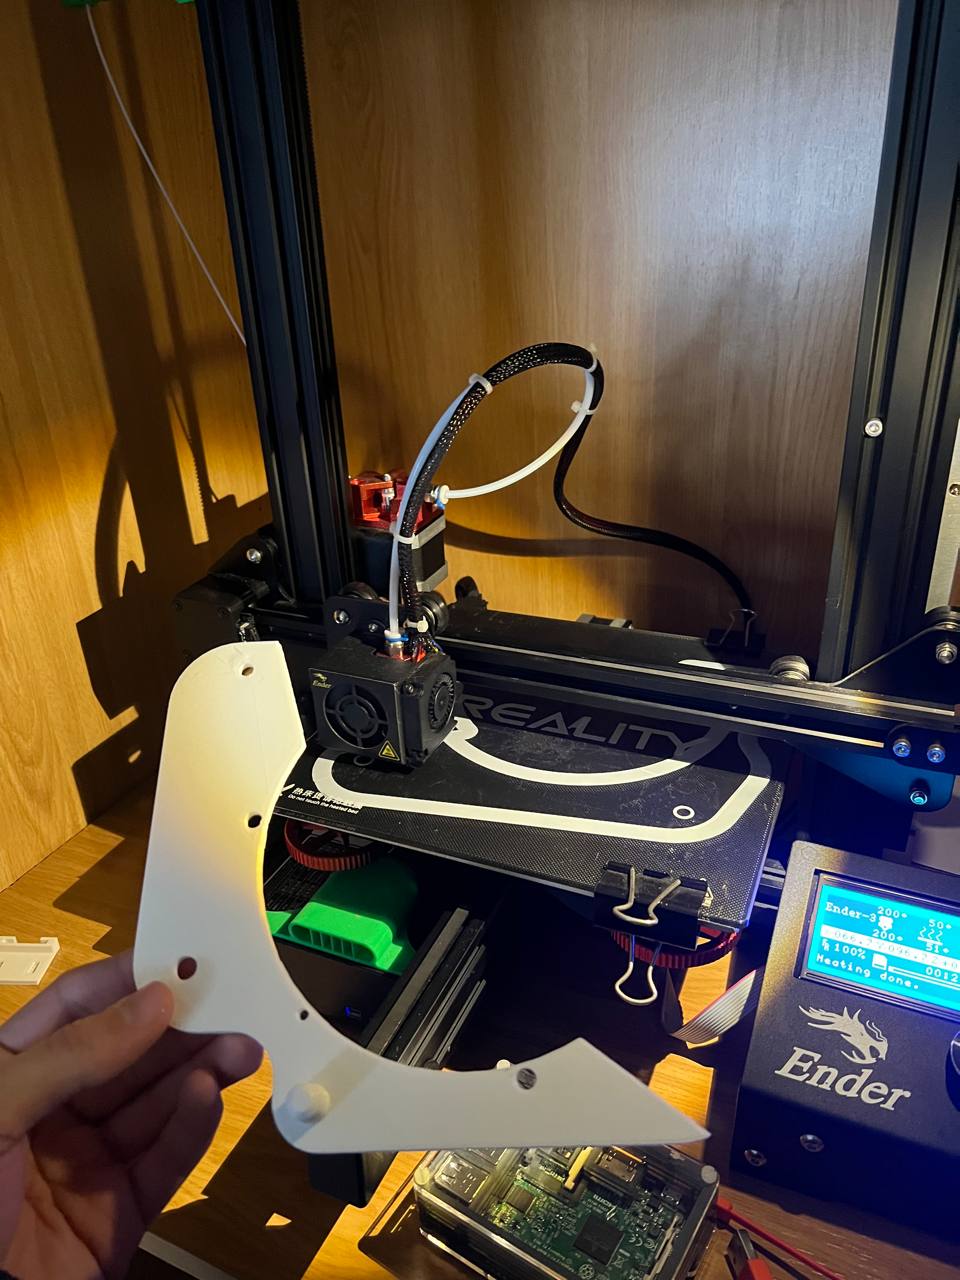
The printer has a print area of 220 x 220 x 250 mm as such we could not fit the final object in the printer, and we decided to divide the piece in 3 pieces, this would also help with printing as we were able to cut the pieces leaving always a flat surface.
Adding guides in the parts where they would stick together, and the best part is, it actually worked and looked sturdy.
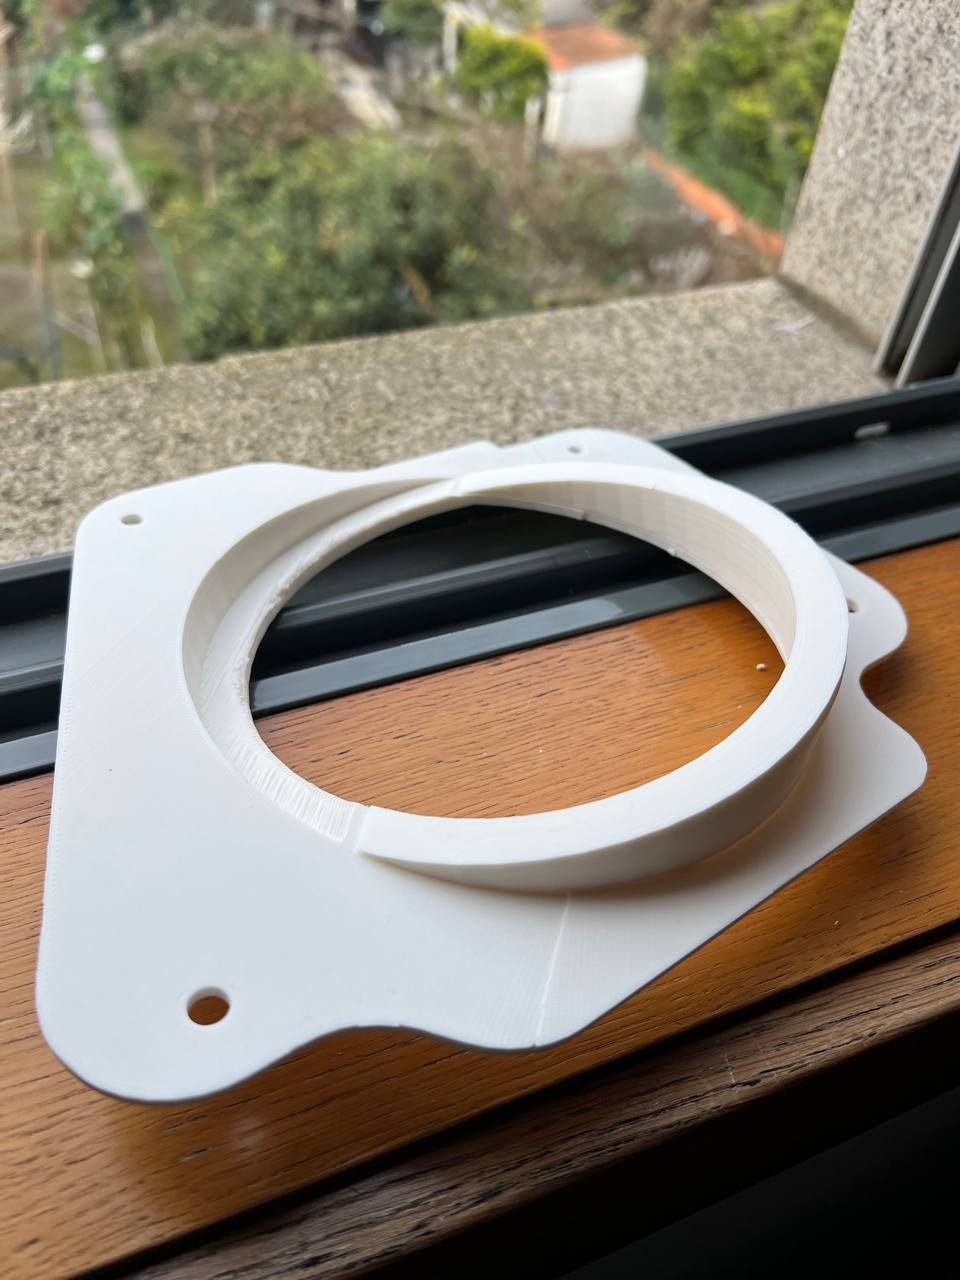
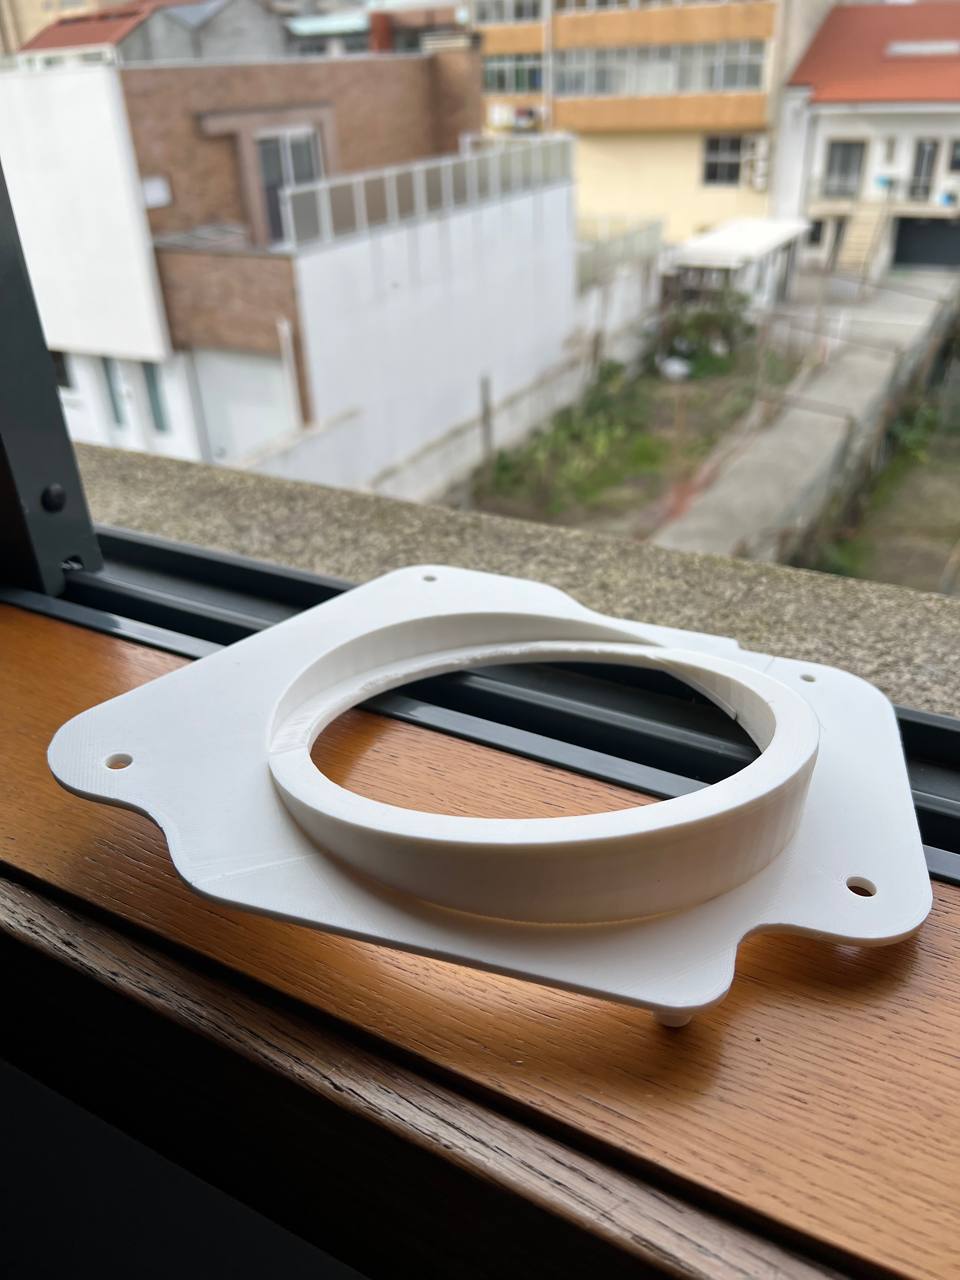
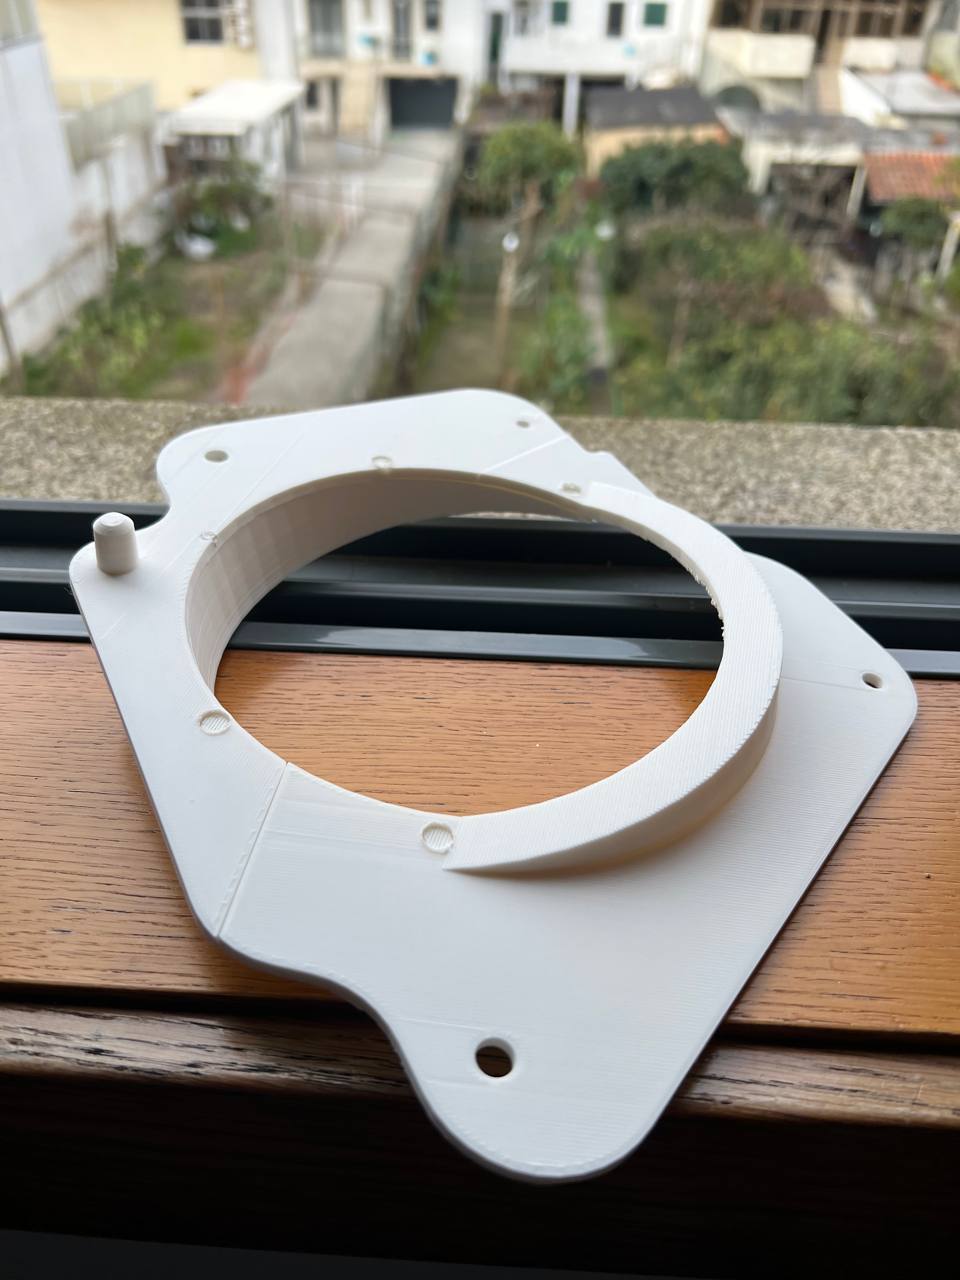
However, we quickly encountered a series of challenges. Achieving accurate dimensions for a complex object like this proved to be more difficult than anticipated.
The intricate curves, angles, and mounting points required precise measurements, which we struggled to convert into digital dimensions, maybe we were doing these measurements wrong?
A Shift in Approach
I realized that the 3D-printing route might take longer than initially thought. It was becoming apparent that I needed a simpler, more accessible approach to install the JBL speakers, as this was already slowing the rest of the interior restoration.
DIY Solution with MDF
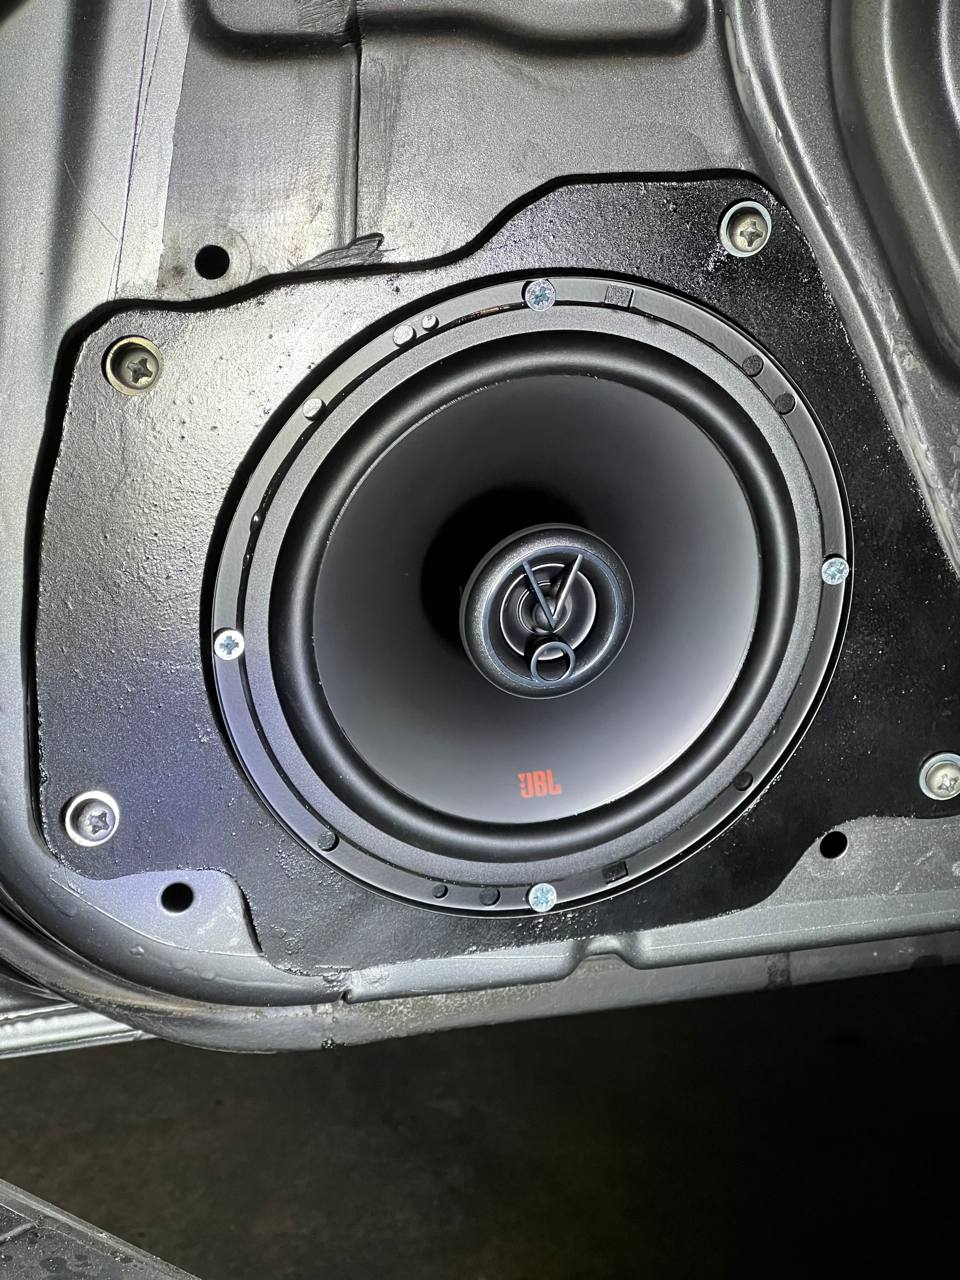
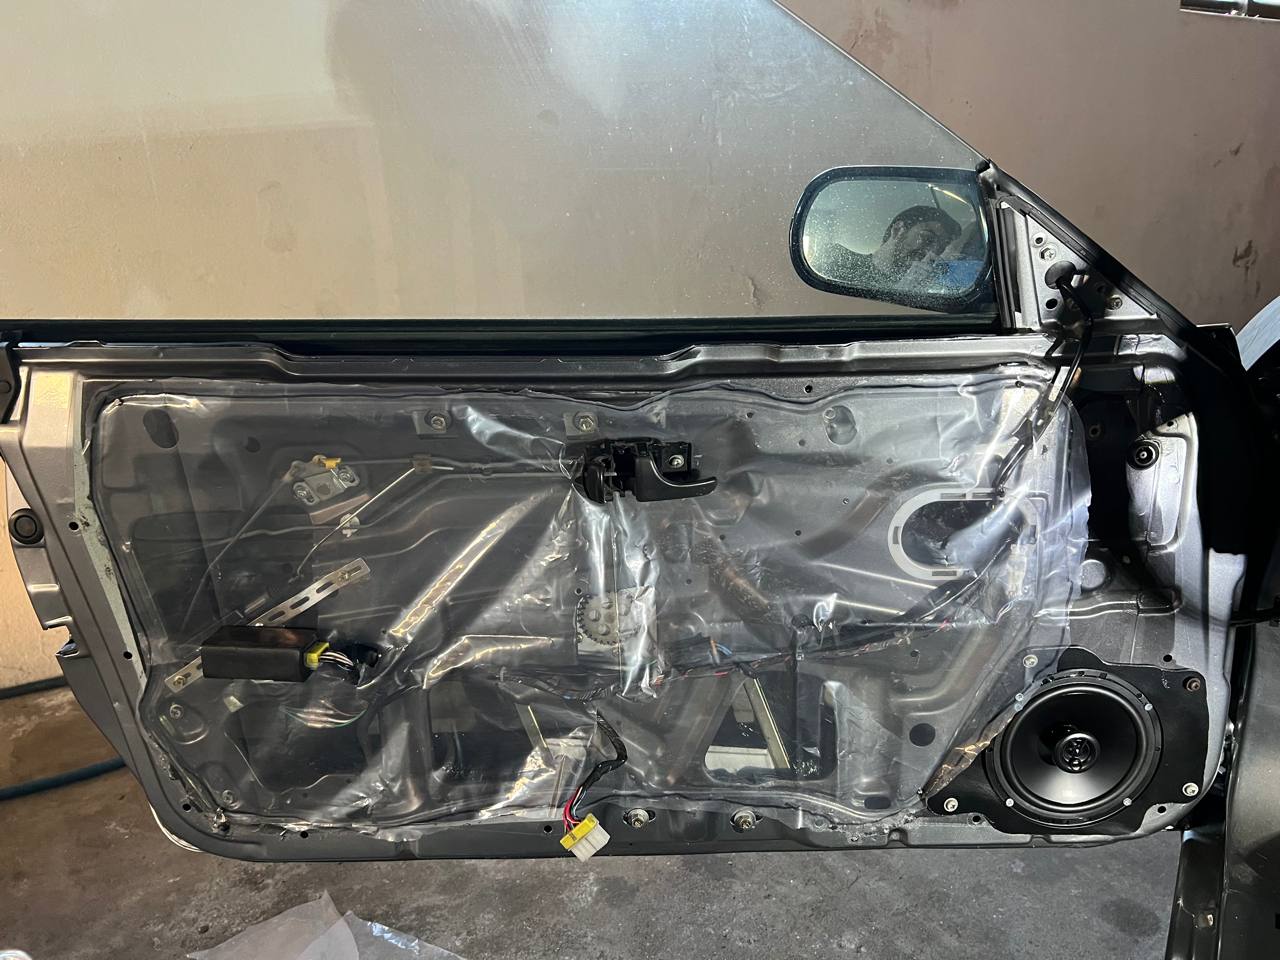
Inspired by what everyone was doing online, I decided to opt for the easy DIY solution using MDF. With some basic tools, anyone can do this at home. In the following pictures, you can also see the new water protection I did.
Conclusion
I have to say this was a fun project and while 3D printing can be a powerful tool, it is crucial to assess its suitability for a specific project and be willing to adapt when faced with unforeseen challenges.
Ultimately, my DIY solution using MDF proved to be a successful approach, enabling me to install the upgraded speakers in my Nissan 200SX.
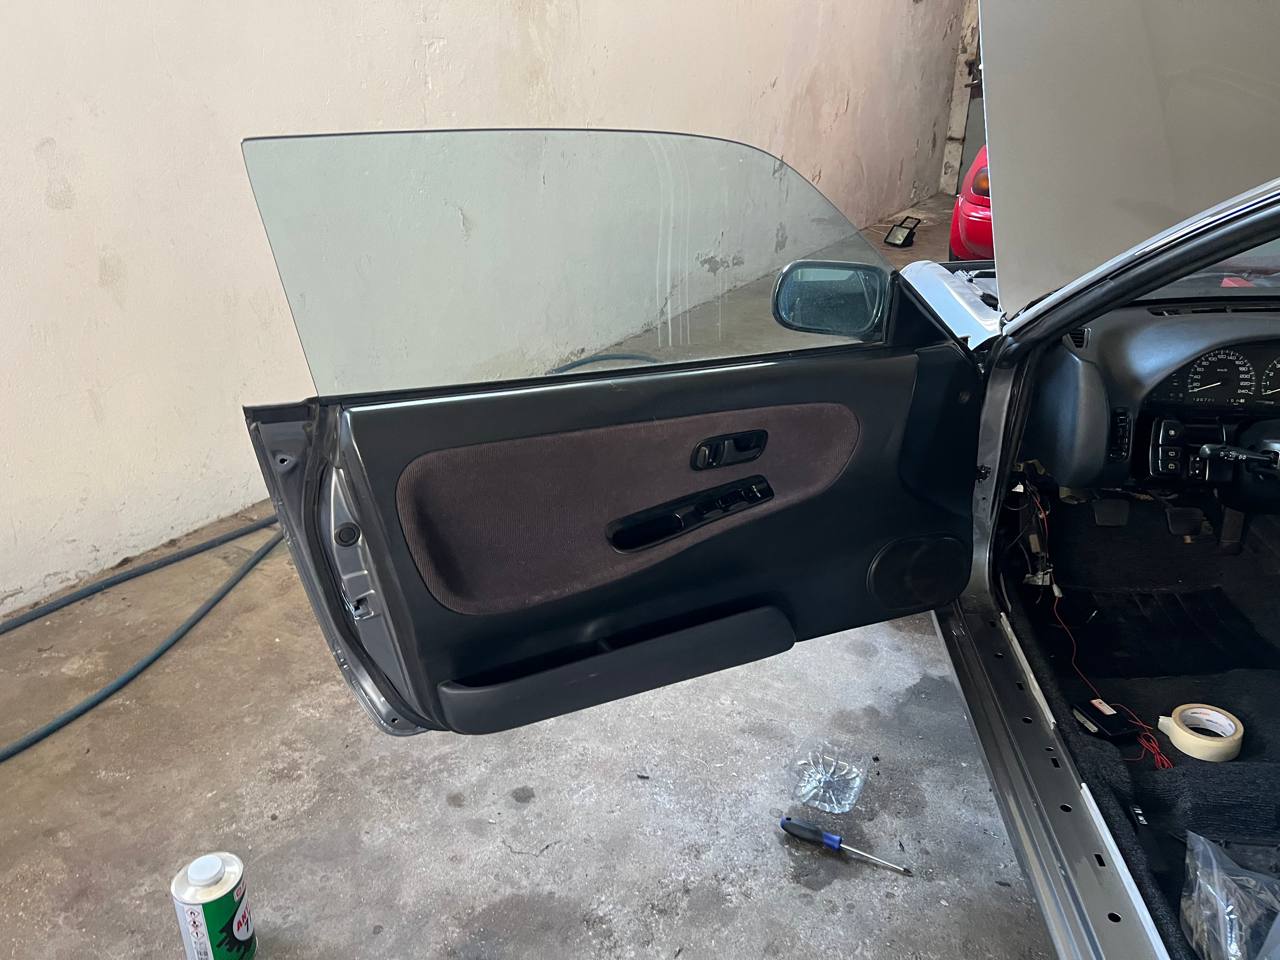
And here it is with the door card installed. You can’t even tell this was modified, and that’s the main objective of my interior modifications on this car.
wanted new jbl 6.5s in the doors of the 89 200sx shitbox, to go with the pioneer dual din touchscreen (SPH-DA160DAB). stock speakers old and tiny
nothing plug and play online. off the shelf adapters dont tilt the speaker to the seat, ship from the other side of the world or cost stupid money. so build it myself
tried a 6.5 adapter off thingiverse on the ender 3
looks nice, thought id mix it with an mdf base. nope, speaker hits the door card
called cousin pedro castro, he has the mechanical background i dont. measured the original piece, door hole, speakers
print bed is 220x220x250, doesnt fit in one go. split in 3 with guides, always cutting on a flat surface. worked, felt sturdy
but getting dimensions right on the curves and mounting points was way harder than expected, maybe we measured wrong idk. blocking the rest of the interior resto
so did what everyone online does, mdf + basic tools + some paint. also redid the water protection while in there
fun project. lesson: 3d printing is cool but not always the right tool. mdf worked, speakers in, door card on, cant even tell its modified which is the whole point 👌
Introduction
Upgrading the audio in my shitbox 1989 Nissan 200SX meant fitting new JBL 6.5-inch speakers in the front doors to match the new Pioneer dual-din touchscreen radio (SPH-DA160DAB). The stock speakers were old and small. My first idea was a 3D printed piece imitating the original plastic trim that holds the speaker, but I ended up with a simple MDF adapter, basic tools, and a touch of paint. Only I will ever see the inside of the door, but it still has to look pretty for me.
Research
I hoped for something I could print right off and bolt in. Nothing like that exists online. The off-the-shelf adapters I found don’t tilt the speaker toward the seat, and they either ship from the other side of the world at painful cost or are already stupidly expensive. I would have to build something.
3D-Printed Adapter
The plan: design and print an adapter matching the new speakers exactly, cleanly replacing the old plastic trim.
I started with a 6.5-inch adapter from Thingiverse, printed on my Ender 3:
Round and nice-looking, so I considered mixing it with an MDF base. It didn’t fit; the speaker hit the door card.
For a design from zero I needed someone with a mechanical background, so I reached out to my cousin Pedro Castro, who actually knows what he is doing. We measured the original piece, the door hole, and the speakers.
The printer’s 220 x 220 x 250 mm build area couldn’t hold the final object, so we split it into three pieces, cutting so every part kept a flat surface for printing, with guides where they join. Assembled, it worked and felt sturdy.
But accurate dimensions on a complex object proved harder than expected. The curves, angles, and mounting points needed precise measurements we struggled to convert into digital dimensions. Maybe we were measuring wrong.
A Shift in Approach
The 3D printing route was going to take longer than planned and was already slowing the rest of the interior restoration. Time for something simpler.
Inspired by what everyone was doing online, I went with the easy MDF solution. Basic tools, doable at home by anyone. The pictures also show the new water protection I added.
Conclusion
A fun project. 3D printing is a powerful tool, but it pays to assess whether it suits the job and to adapt when it doesn’t. The MDF adapter worked, and the upgraded speakers are in.
With the door card installed, you can’t even tell it was modified. That’s the main objective of my interior modifications on this car.
Introduction
In the ever-evolving landscape of classic car restoration, few upgrades are as rewarding, or as deceptively challenging, as a modern audio system. Whether you’re a seasoned restorer or a weekend enthusiast, the fundamentals remain the same: careful planning, patient execution, and a willingness to adapt. When I decided to upgrade the audio in my shitbox 1989 Nissan 200SX, my goal was clear: install new JBL 6.5-inch speakers in the front doors to pair seamlessly with my new Pioneer dual-din touchscreen radio (SPH-DA160DAB). The stock speakers were old and small, so I embarked on a comprehensive quest to find a suitable solution.
After extensive research and exploring different approaches, my initial vision was to create a 3D printed piece that would faithfully imitate the original plastic trim holding the speaker. However, I eventually arrived at a simple DIY solution leveraging MDF (Medium-Density Fiberboard), some basic tools, and a touch of paint. It’s important to note that only I will ever see the inside of the door, but it still has to look pretty for me, right?
In this article, we’ll delve into my progress, the solutions I discovered online, and the approach I took to developing this adapter.
Research
Every successful project begins with due diligence, and this one was no exception. My journey began with thorough research into the speaker installation landscape for the Nissan 200SX, exploring forums, marketplaces, and community resources alike.
I was hoping for an easy solution, something I could print right off that would be truly plug and play. Unfortunately, this was not the case; nothing available online resembled what I needed. I did come across several off-the-shelf adapters, but it’s worth highlighting that they didn’t tilt the speaker toward the seat. Furthermore, they either shipped from the other side of the world, which would cost a lot in shipping, or they were already stupidly expensive. It became increasingly clear that I would have to build something myself.
3D-Printed Adapter
My initial plan wasn’t just ambitious, it was precise: design and 3D print an adapter that would exactly fit the dimensions of the new speakers and cleanly replace the old plastic trim in the door panel.
Something off Thingiverse?
First, I discovered a promising 6.5-inch adapter on Thingiverse and promptly printed it on my Ender 3:
It’s round, it looks nice, and I thought I could seamlessly combine it with an MDF base. However, I would soon discover a critical limitation: it would not fit, as the speaker would hit the door card.
Back to the drawing board
At this stage, I needed help, specifically, someone with a mechanical background who could actually guide the design from zero. Collaboration, after all, is often the key that unlocks projects like this one. So I reached out to my cousin, Pedro Castro, who actually knows what he is doing.
Together, we took all the measurements of the original piece, the door hole, and the speakers, and got to work.
The printer has a print area of 220 x 220 x 250 mm, which meant we could not fit the final object in the printer. Rather than viewing this as a limitation, we treated it as an opportunity to innovate. Our solution was both practical and robust: divide the piece into three parts. This approach also streamlined printing, as we were able to cut the pieces while always leaving a flat surface for the print bed, a small but significant optimization.
We added guides where the parts would stick together, and here’s the best part: it actually worked and looked sturdy.
However, we quickly encountered a series of challenges. Achieving accurate dimensions for a complex object like this proved to be more difficult than anticipated, a reminder that the physical world rarely bends to our digital expectations.
The intricate curves, angles, and mounting points demanded precise measurements, which we struggled to convert into digital dimensions. Maybe we were doing these measurements wrong? It’s a question worth pondering.
A Shift in Approach
It’s important to recognize when a strategy isn’t delivering, and equally important to act on that recognition. I realized that the 3D-printing route might take longer than initially thought, and it was becoming apparent that I needed a simpler, more accessible approach to install the JBL speakers, especially since this was already slowing the rest of the interior restoration. Sometimes the best path forward isn’t the most sophisticated one; it’s the one that actually gets the job done.
DIY Solution with MDF
Inspired by what everyone was doing online, I decided to pivot to the easy DIY solution using MDF. Whether you’re a seasoned fabricator or a complete beginner, with some basic tools, anyone can do this at home. In the following pictures, you can also see the new water protection I implemented.
Conclusion
I have to say this was a genuinely fun project, and it offered valuable lessons along the way. While 3D printing can be a powerful tool, it is crucial to assess its suitability for a specific project and remain willing to adapt when faced with unforeseen challenges. This isn’t just about speakers, it’s about knowing when to change course.
Ultimately, my DIY solution using MDF proved to be a successful approach, enabling me to install the upgraded speakers in my Nissan 200SX with confidence.
And here it is with the door card installed. You can’t even tell this was modified, and that’s precisely the main objective of my interior modifications on this car: seamless, invisible, and effective.
Introduction: Where Passion Meets Engineering 🚗✨
In today’s fast-paced world of automotive restoration, few journeys are as profoundly transformative as breathing new sonic life into a beloved classic. Have you ever sat in a vintage car and wondered what it would sound like with a modern audio system? Have you ever felt that a machine from another era deserved a soundtrack worthy of its soul? I certainly did. And so began an odyssey, part engineering challenge, part personal growth story, part love letter to a car, that I’m beyond excited, deeply honored, and genuinely thrilled to share with you today.
When I made the momentous decision to upgrade the audio system in my shitbox 1989 Nissan 200SX, my vision was crystal clear: install brand-new JBL 6.5-inch speakers in the front doors to pair harmoniously with my new Pioneer dual-din touchscreen radio (SPH-DA160DAB). The stock speakers, dear reader, were old and small, relics of a bygone era, and so I embarked on nothing short of a quest to find a suitable solution.
After extensive research, careful deliberation, and exploring a rich tapestry of different approaches, my initial dream was to create a 3D printed masterpiece that would faithfully imitate the original plastic trim holding the speaker. However, as you’ll soon discover, I eventually arrived at a beautifully simple DIY solution using MDF (Medium-Density Fiberboard), some basic tools, and a touch of paint. Is that a compromise? Perhaps. But here’s the thing: only I will ever see the inside of the door, and it still has to look pretty for me, right? 😄
In this article, we’ll delve deep, and I mean truly delve, into my progress, the solutions I discovered online, and my approach to developing this game-changing adapter.
The Research Phase: Leaving No Stone Unturned 🔍
Every great journey begins with a single step, and mine began with thorough, exhaustive, no-stone-unturned research into the speaker installation landscape for the Nissan 200SX. Forums, marketplaces, obscure corners of the internet, if it existed, I looked at it. Why? Because preparation isn’t just half the battle; in projects like this, it practically is the battle.
What was I hoping for? Simple:
- An easy solution: Something I could print right off the printer.
- Plug and play simplicity: No fabrication, no fuss, no friction.
- A perfect fit: Seamless integration with the original door.
Obviously, this was not the case. The harsh reality? There was absolutely nothing available online similar to what I wanted. I did come across several off-the-shelf adapters, but it’s crucial to understand their limitations:
- No tilt: They didn’t tilt the speaker toward the seat, a dealbreaker for acoustic excellence.
- Geography: They came from the other side of the world, which would cost a lot in shipping.
- Price: The alternatives were already stupidly expensive.
It became abundantly, unmistakably clear that I would have to build something myself. And honestly? That’s where the magic begins. ✨
The 3D-Printed Adapter: A Bold Vision 🖨️
My initial plan wasn’t just a plan, it was a bold statement of intent: design and 3D print an adapter that would precisely fit the dimensions of the new speakers and cleanly replace the old plastic trim in the door panel.
Something off Thingiverse? 🤔
First, in a moment of serendipitous discovery that felt almost like destiny, I found a 6.5-inch adapter on Thingiverse, that magnificent digital commons where makers around the globe share their creations freely, and I eagerly went to print it on my trusty Ender 3:
It’s round. It looks nice. So naturally, I thought: maybe I can just mix this with an MDF base and call it a day? But, and this is where our story takes a dramatic turn, I would soon find out it would not fit, as the speaker would hit the door card. Devastating? A little. Discouraging? Never.
Back to the Drawing Board 📐
This time, I needed help, real help. Someone with a genuine mechanical background who could actually help me design from 0. So I reached out to my cousin, Pedro Castro, who, and I cannot stress this enough, actually knows what he is doing.
Together, we embarked on a meticulous measurement campaign:
- The original piece: Every curve documented.
- The door hole: Mapped with care.
- The speakers: Measured down to the detail.
And then, we got to work.
Now, here’s where innovation truly shines. The printer has a print area of 220 x 220 x 250 mm, and as such, we could not fit the final object in the printer. Our game-changing solution? Divide the piece into 3 pieces! This wasn’t just a workaround, it was a strategic masterstroke, because it also helped with printing: we were able to cut the pieces leaving always a flat surface.
We added guides in the parts where they would stick together, and the best part? It actually worked and looked sturdy. Talk about a win! 🎉
However, and it’s important to be fully transparent here, we quickly encountered a series of formidable challenges. Achieving accurate dimensions for a complex object like this proved to be more difficult than anticipated, a humbling reminder that the physical world doesn’t always cooperate with our digital dreams. Let’s break down exactly what made this so hard:
- Intricate curves: Organic shapes that resist simple measurement.
- Tricky angles: Every degree matters when a speaker needs to clear a door card.
- Mounting points: Precision here is non-negotiable.
All of these required precise measurements, which we struggled to convert into digital dimensions. Maybe we were doing these measurements wrong? It’s a question that haunts every maker at some point in their journey, and I’d be lying if I said it didn’t haunt me too.
A Shift in Approach: The Power of Pivoting 🔄
Here’s a truth every creator must eventually embrace: knowing when to pivot isn’t failure, it’s wisdom. I realized that the 3D-printing route might take longer than initially thought. It was becoming apparent that I needed a simpler, more accessible approach to install the JBL speakers, especially since this endeavor was already slowing the rest of the interior restoration.
The DIY Solution with MDF: Elegance in Simplicity 🪚
Inspired by what everyone was doing online, that beautiful global community of makers, I decided to opt for the easy DIY solution using MDF. And here’s the empowering part: with some basic tools, anyone can do this at home. Whether you’re a seasoned craftsman or picking up a jigsaw for the very first time, this approach welcomes you. In the following pictures, you can also see the new water protection I did, because true craftsmanship means caring about what nobody sees.
Conclusion: The Journey Is the Destination 🌅
So, what have we learned from this remarkable adventure? Let’s recap the key takeaways:
- Research relentlessly: Nothing plug-and-play existed for this car, and knowing that early saved time later.
- Prototype fearlessly: The Thingiverse print didn’t fit, but it taught us what wouldn’t work.
- Collaborate generously: Pedro’s mechanical expertise elevated the entire endeavor.
- Pivot gracefully: When 3D printing stalled, MDF delivered.
I have to say, this was a genuinely fun project, and while 3D printing can be a powerful, transformative, dare I say revolutionary tool, it is absolutely crucial to assess its suitability for a specific project and be willing to adapt when faced with unforeseen challenges. Because at the end of the day, this story isn’t just about speakers, it’s about resilience, resourcefulness, and the relentless pursuit of a vision. It’s about the rich tapestry of skills, people, and small victories that every restoration weaves together.
Ultimately, my DIY solution using MDF proved to be a resoundingly successful approach, enabling me to install the upgraded speakers in my beloved Nissan 200SX.
Ultimately, my DIY solution wasn’t just a fix, it was a triumph of pragmatism over perfectionism. Isn’t that what the maker spirit is truly all about? Not the fanciest tool, not the flashiest technique, but the courage to choose the path that works?
And here it is, the moment of truth, the grand reveal, the payoff for every measurement and every misstep, with the door card installed. You can’t even tell this was modified, and that, dear reader, is the main objective of my interior modifications on this car: invisible upgrades, timeless character, seamless harmony between old and new.
Thank you, truly, from the bottom of my toolbox, for joining me on this journey. Until next time: keep building, keep dreaming, and keep those classics singing! 🎶🚗✨