← blog · October 17, 2024 · 3 min read
Bringing the GBA to the future
I upgrade my GBA with a new screen, shell, battery and an EZflash to make the ultimate portable gaming device.
$ bloat--level 3Bloatin'
I’ve always loved my Gameboy Advance (GBA), but after years of use, it was time for an upgrade. I decided to breathe new life into my old handheld, which I bought for just 1 single euro from an old colleague in school who was about to throw it into the trash. Mixing nostalgic design with modern tech, here’s how I transformed it from an old-school relic into a portable powerhouse.
Starting with the Old: Shell and Motherboard
To kick things off, I took apart the GBA’s original shell. As much as I loved the old design, the scratched-up exterior and dim screen were begging for an upgrade.
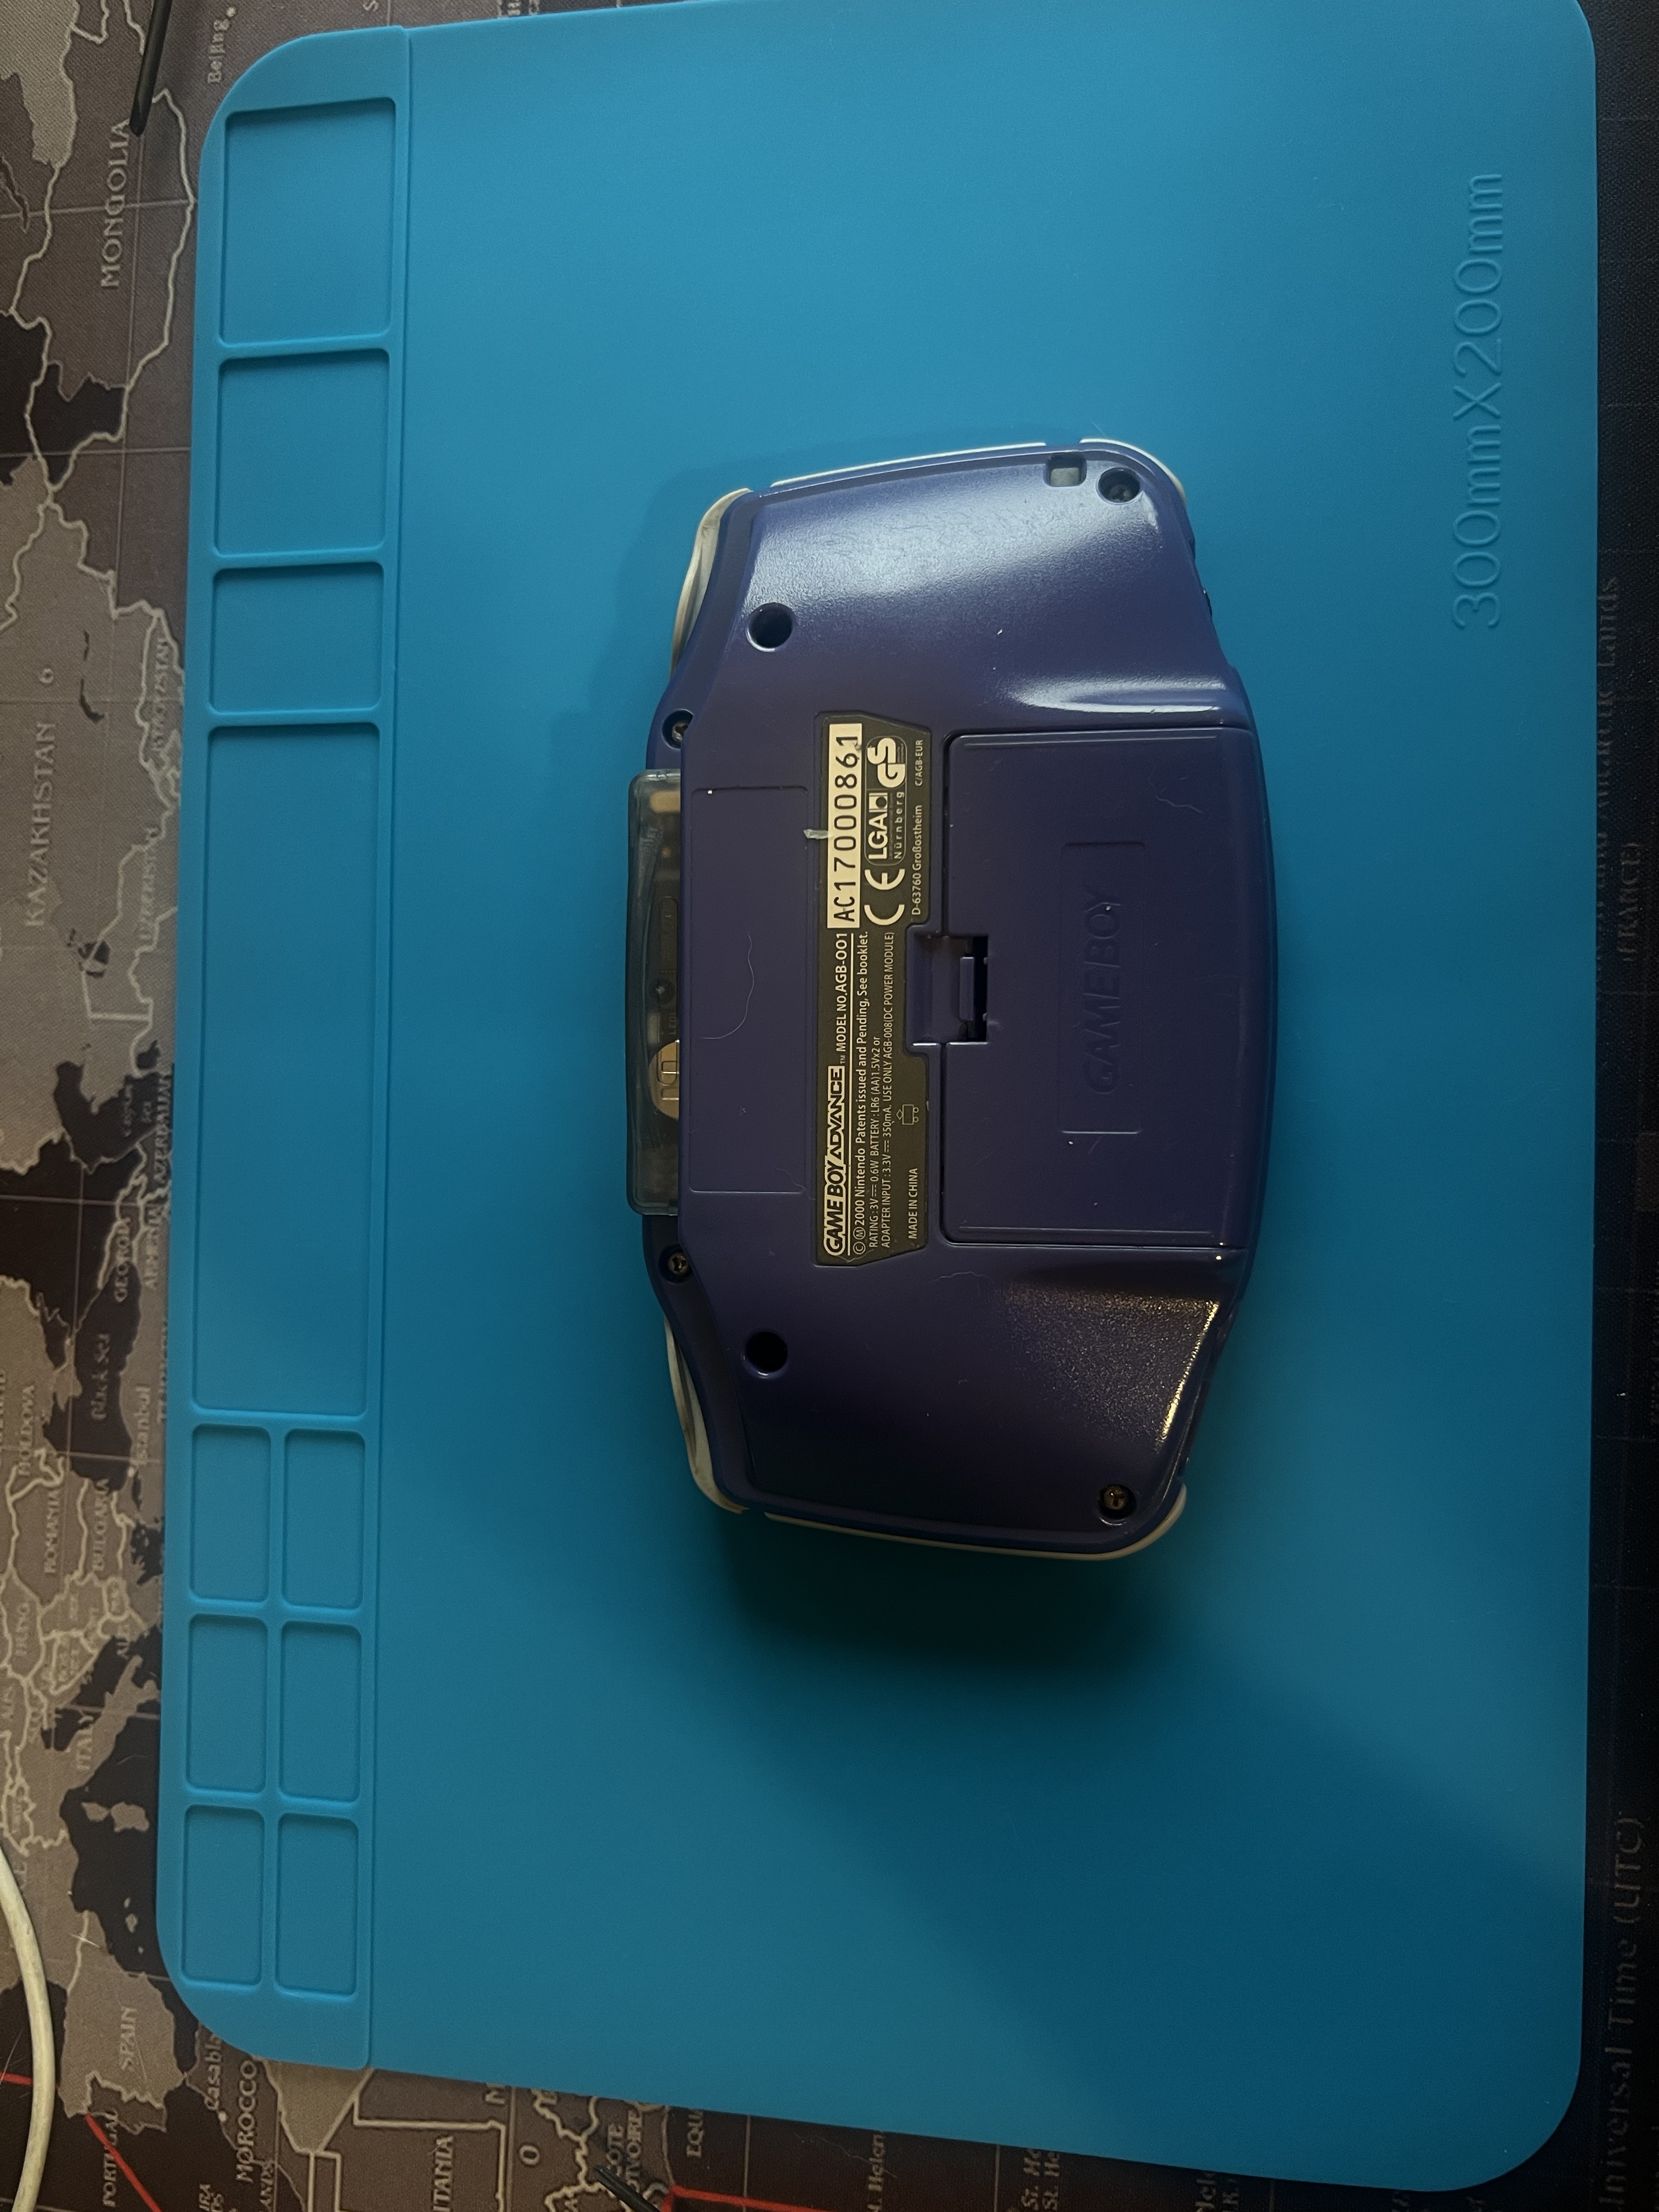
Once I had it open, I got a clear look at the motherboard. Taking apart my GBA felt like stepping into a time machine, but this was just the start.
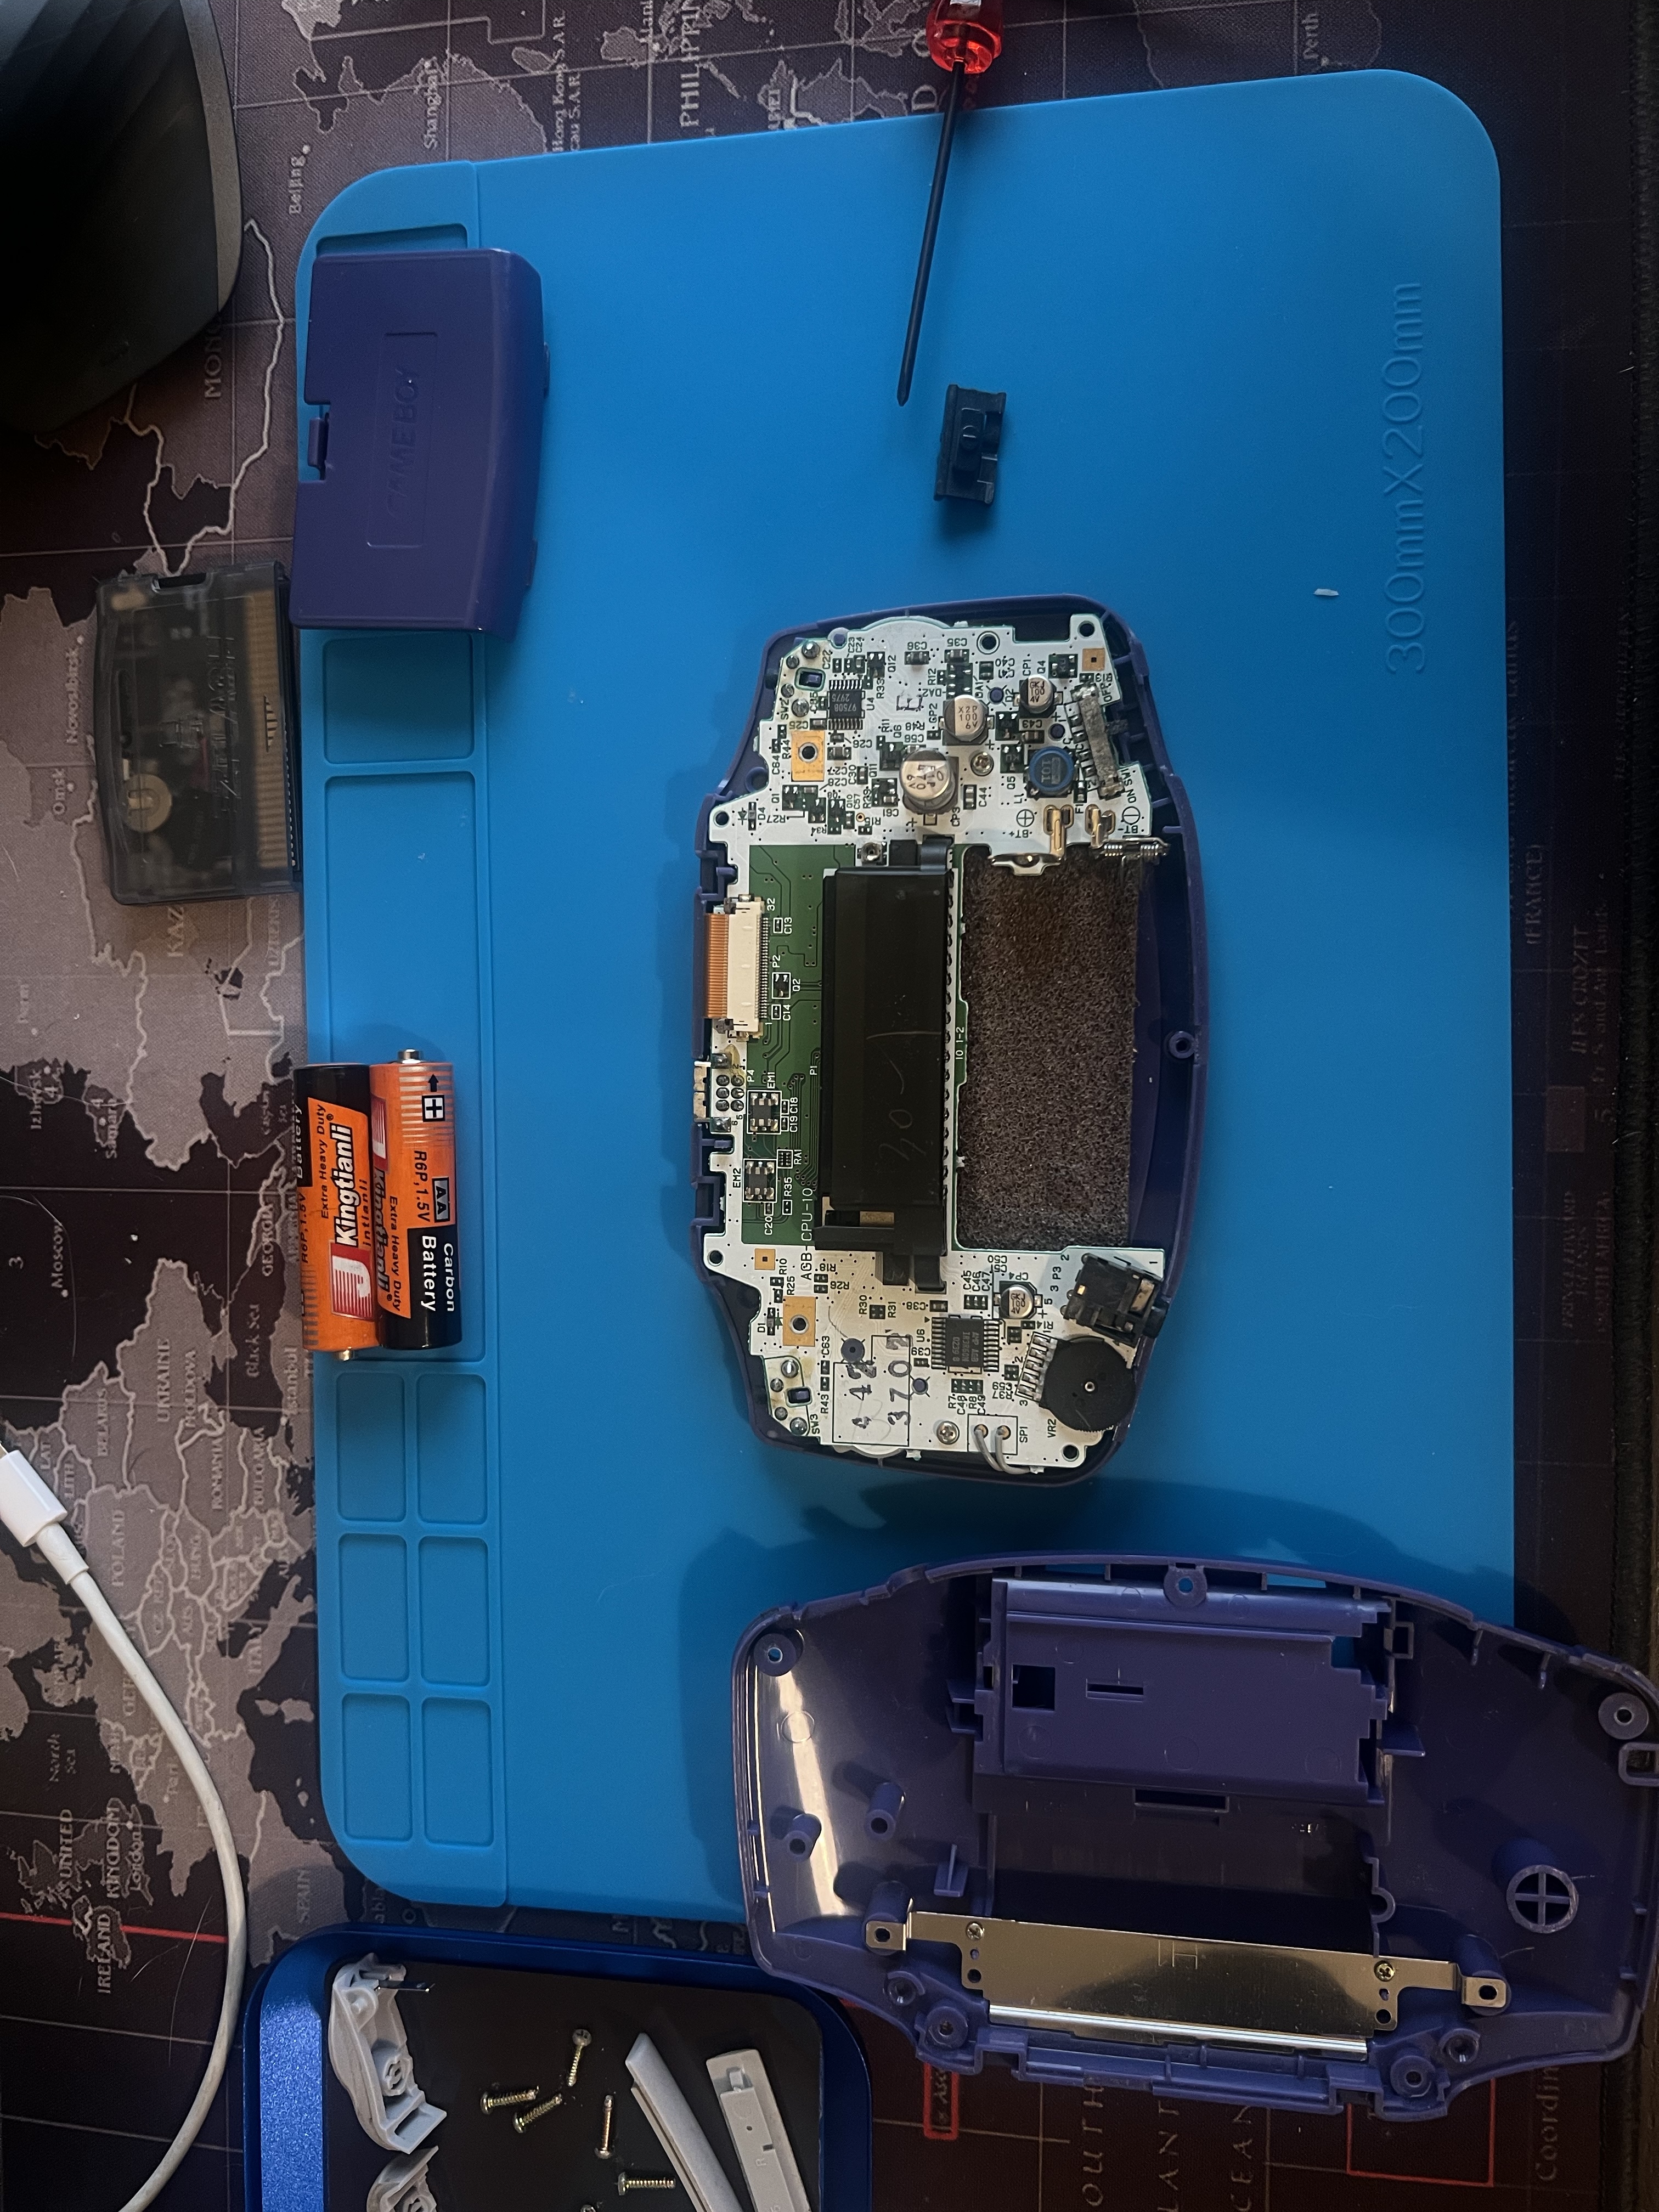
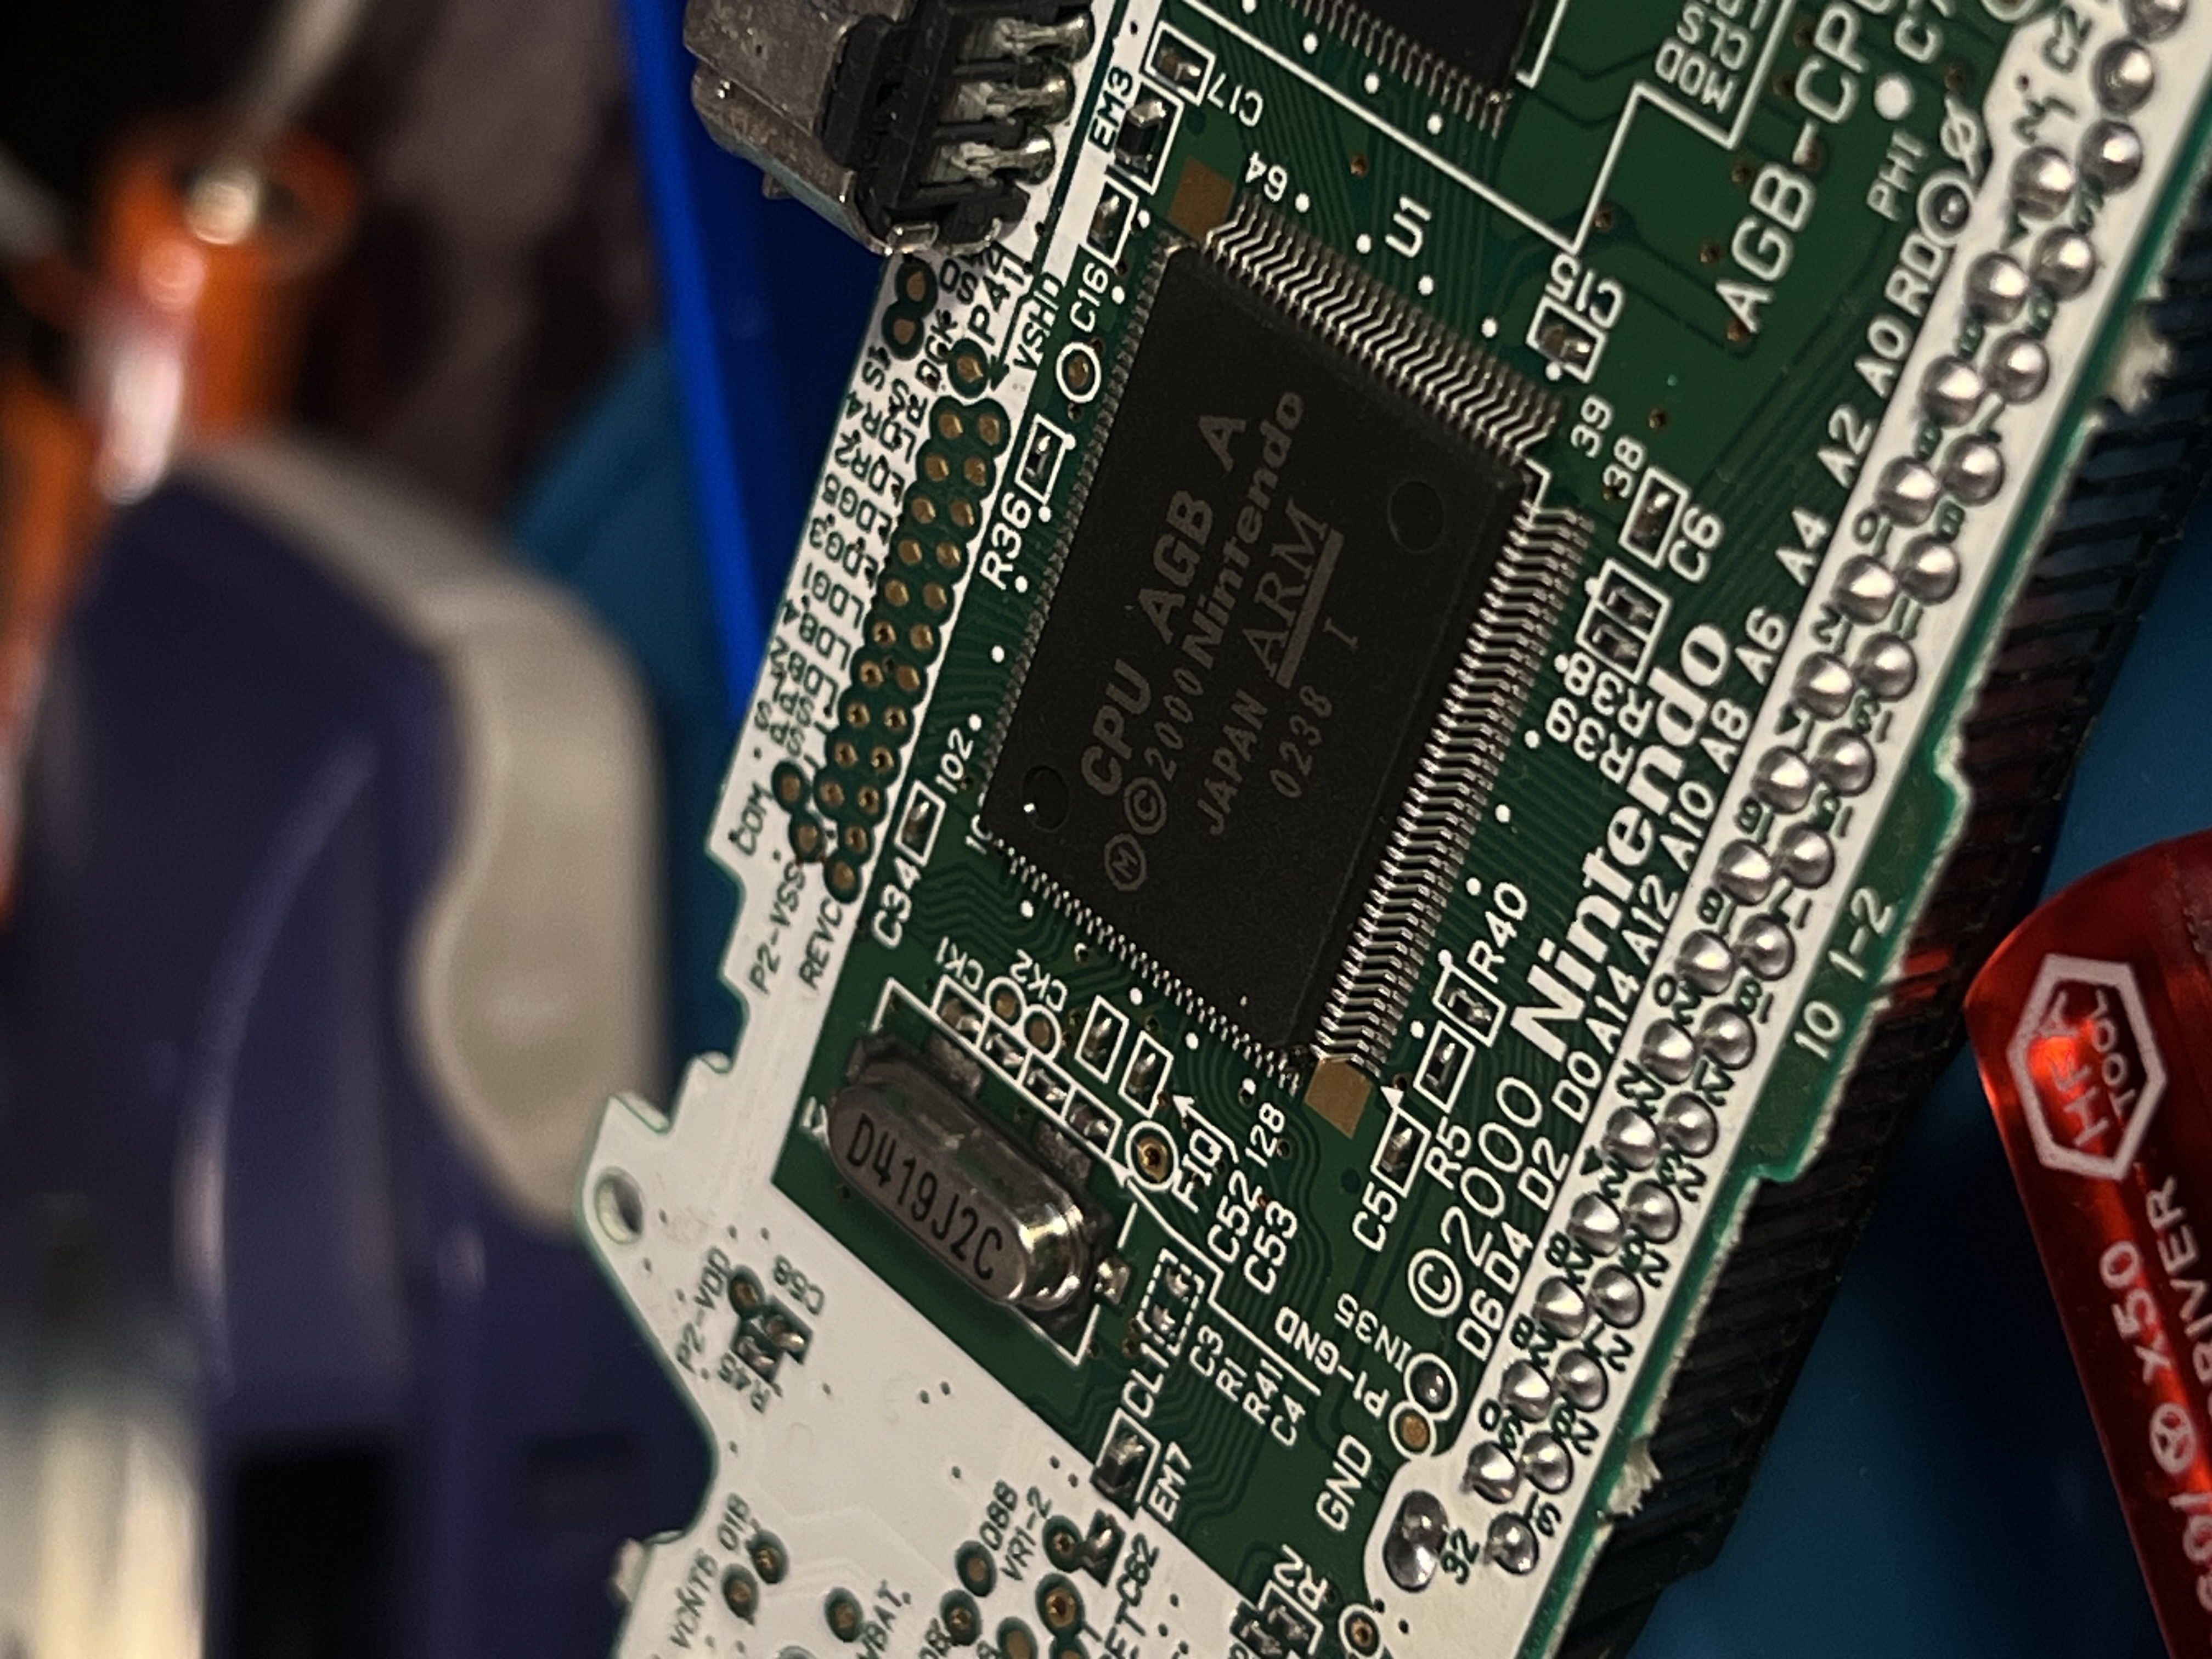
I carefully removed the motherboard. It’s amazing to see how simple yet powerful the internal components are. Here’s the motherboard fully out of the shell.
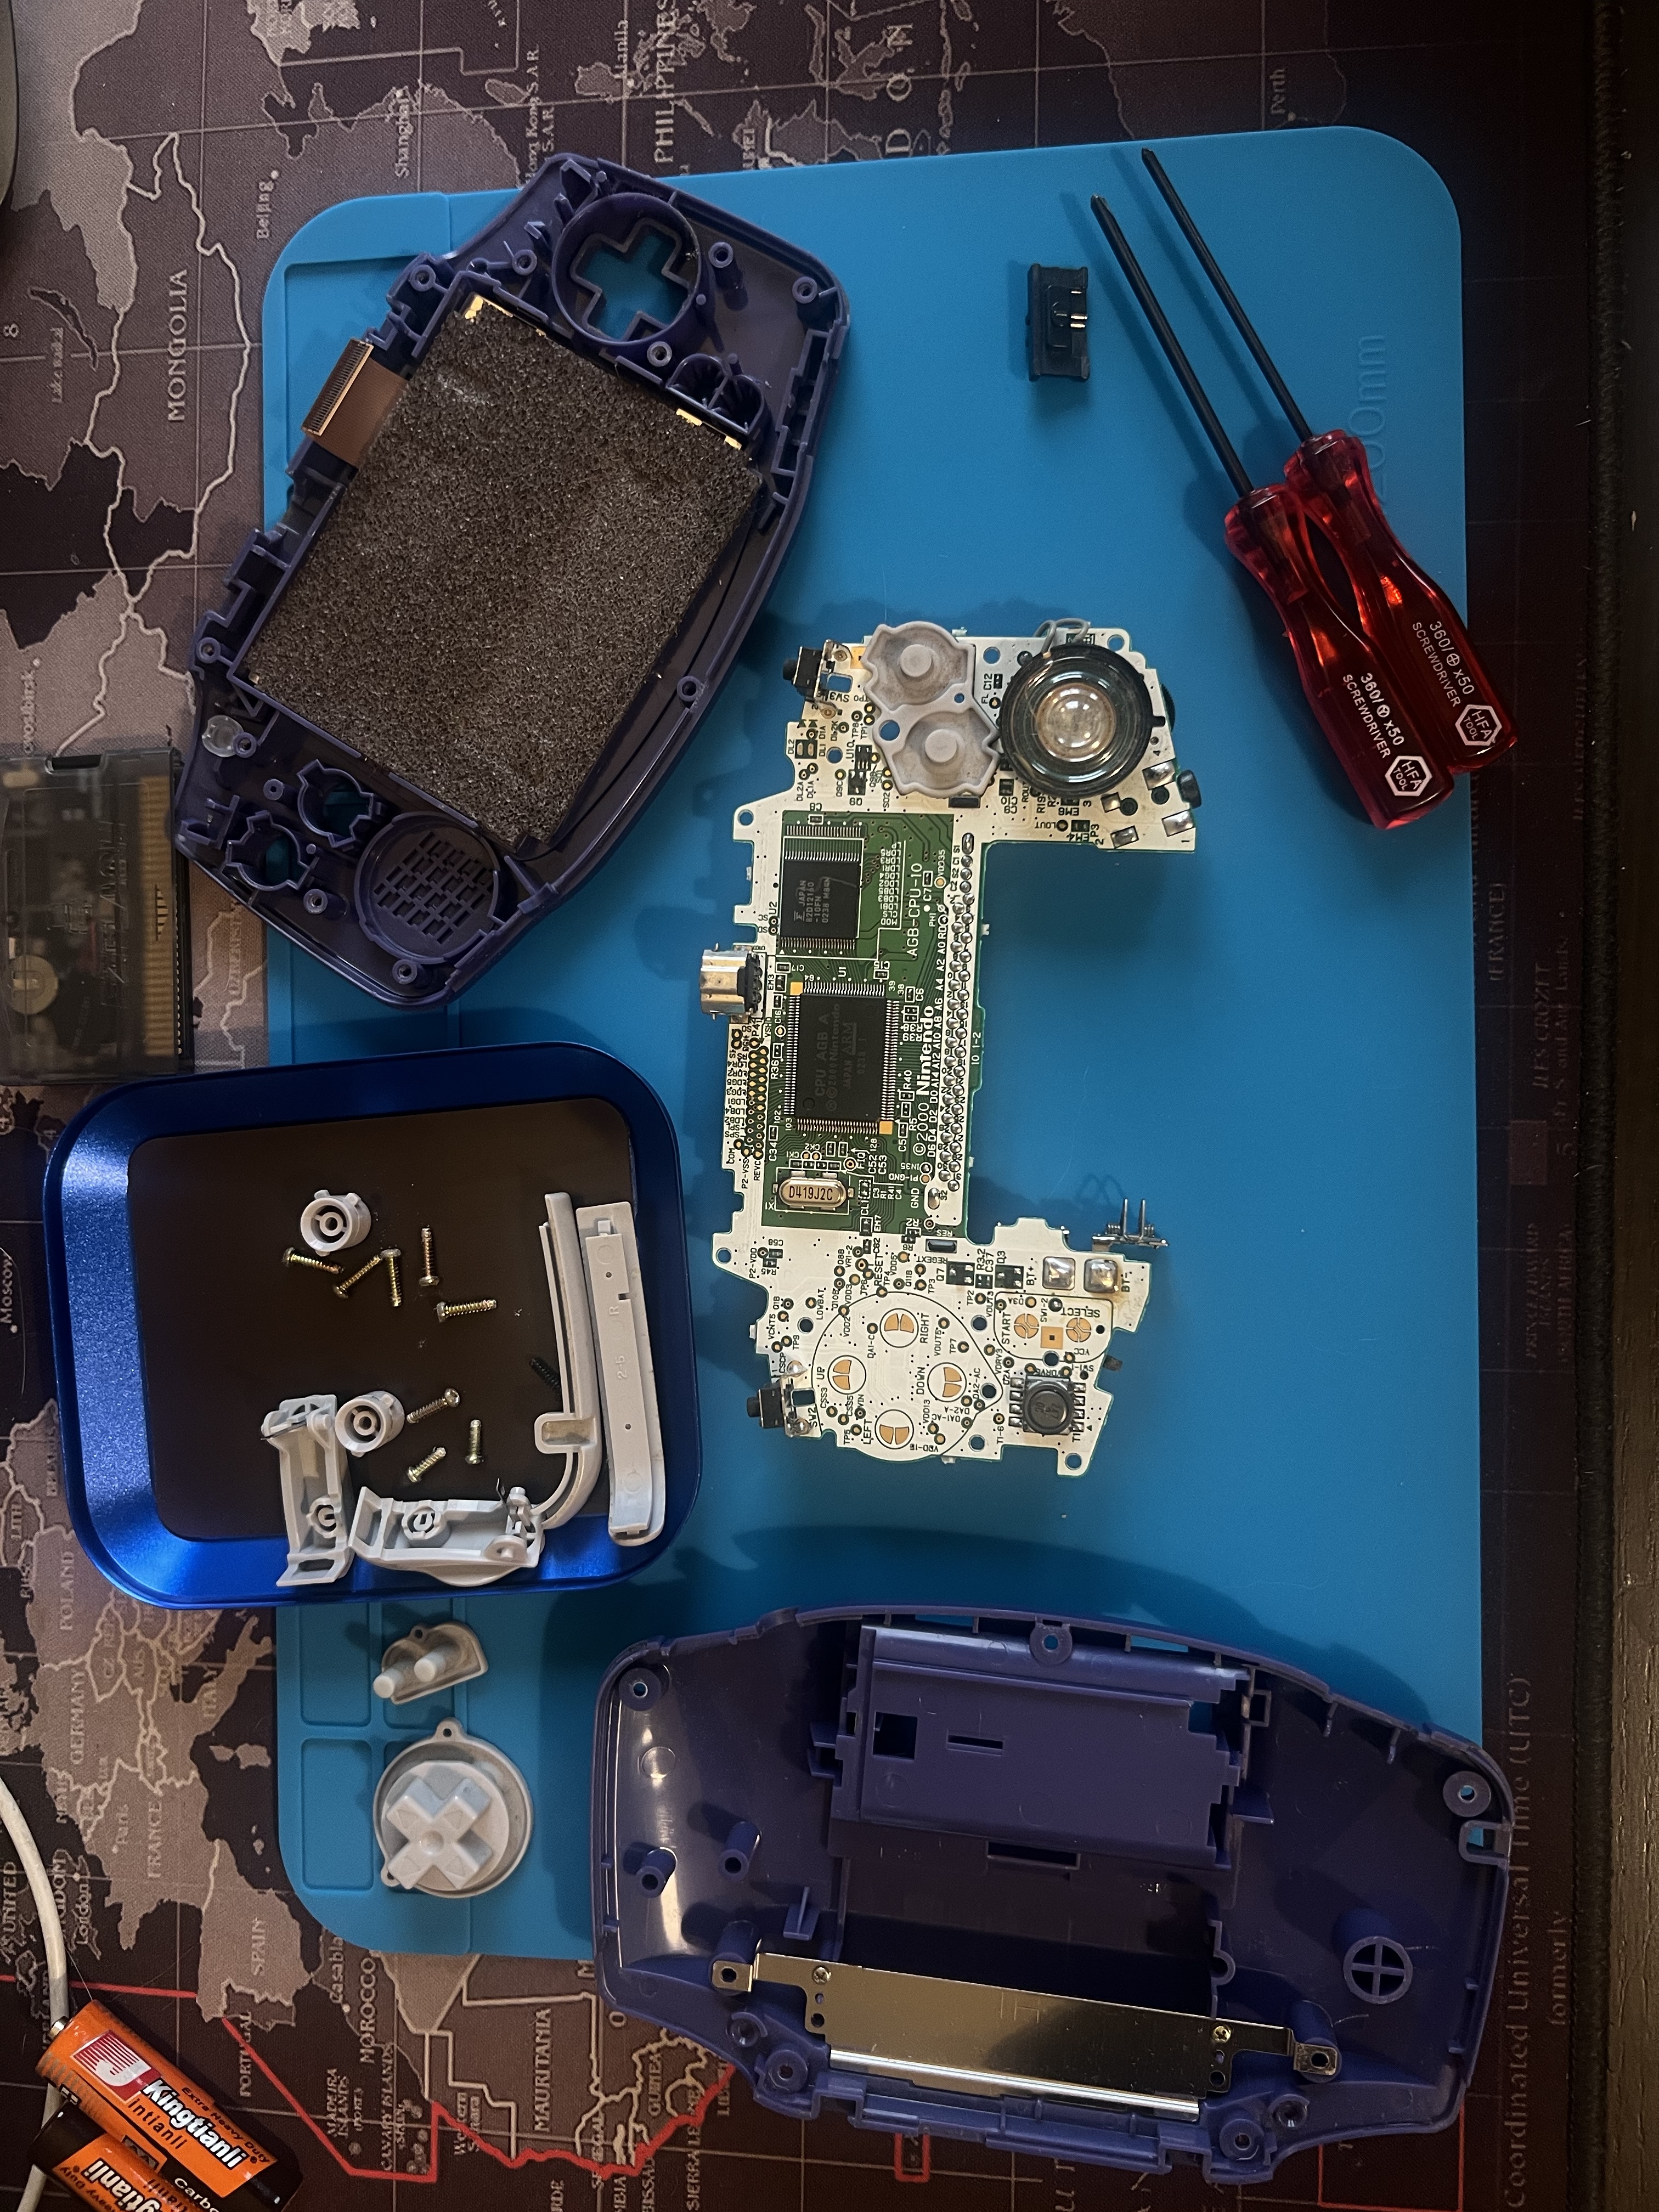
Here’s a close-up shot of the CPU for all the hardware nerds out there. It’s incredible to think how this little chip powered so many of my favorite games growing up.
A Fresh New Look: Transparent Grey Shell with Blue Buttons
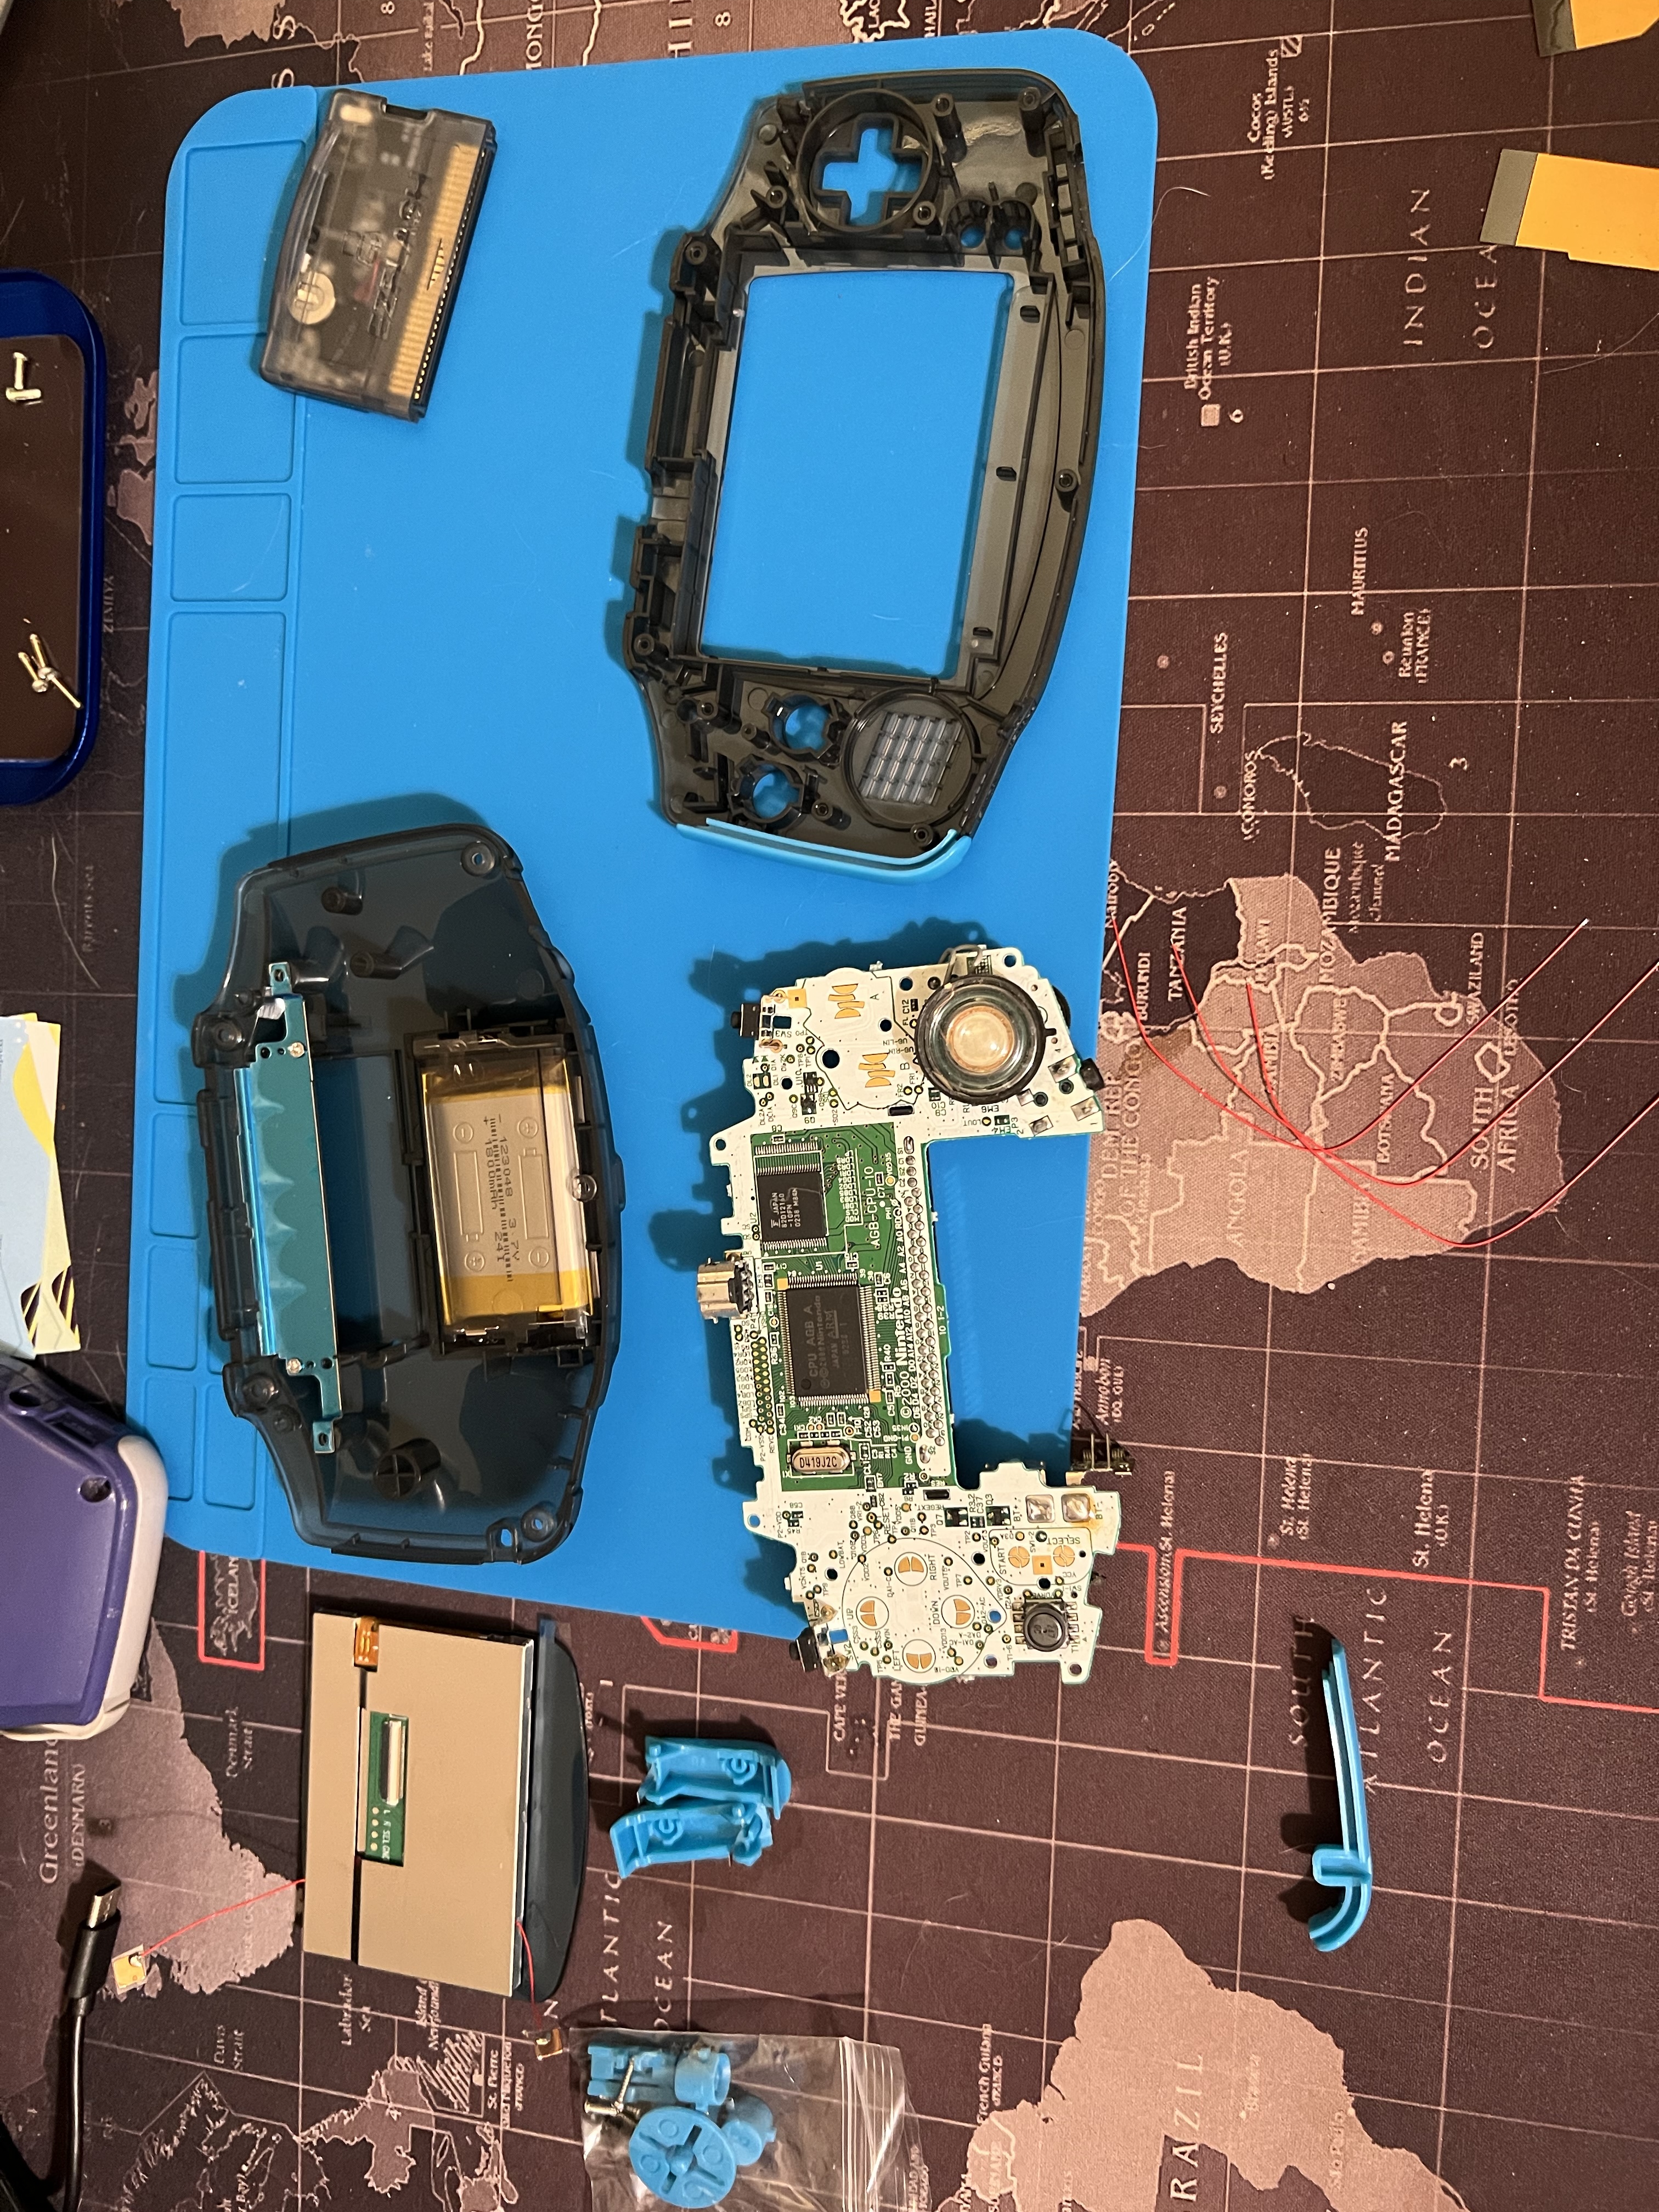
Next up, I swapped the old shell for a transparent grey one with blue buttons. It’s a nice blend of retro vibes and modern style. The best part? This shell came precut for the larger IPS screen, saving me the hassle of modifying it myself.
Here’s a shot of the motherboard next to the new shell, ready to be reunited.
Ditching the AA Batteries: Lithium Power
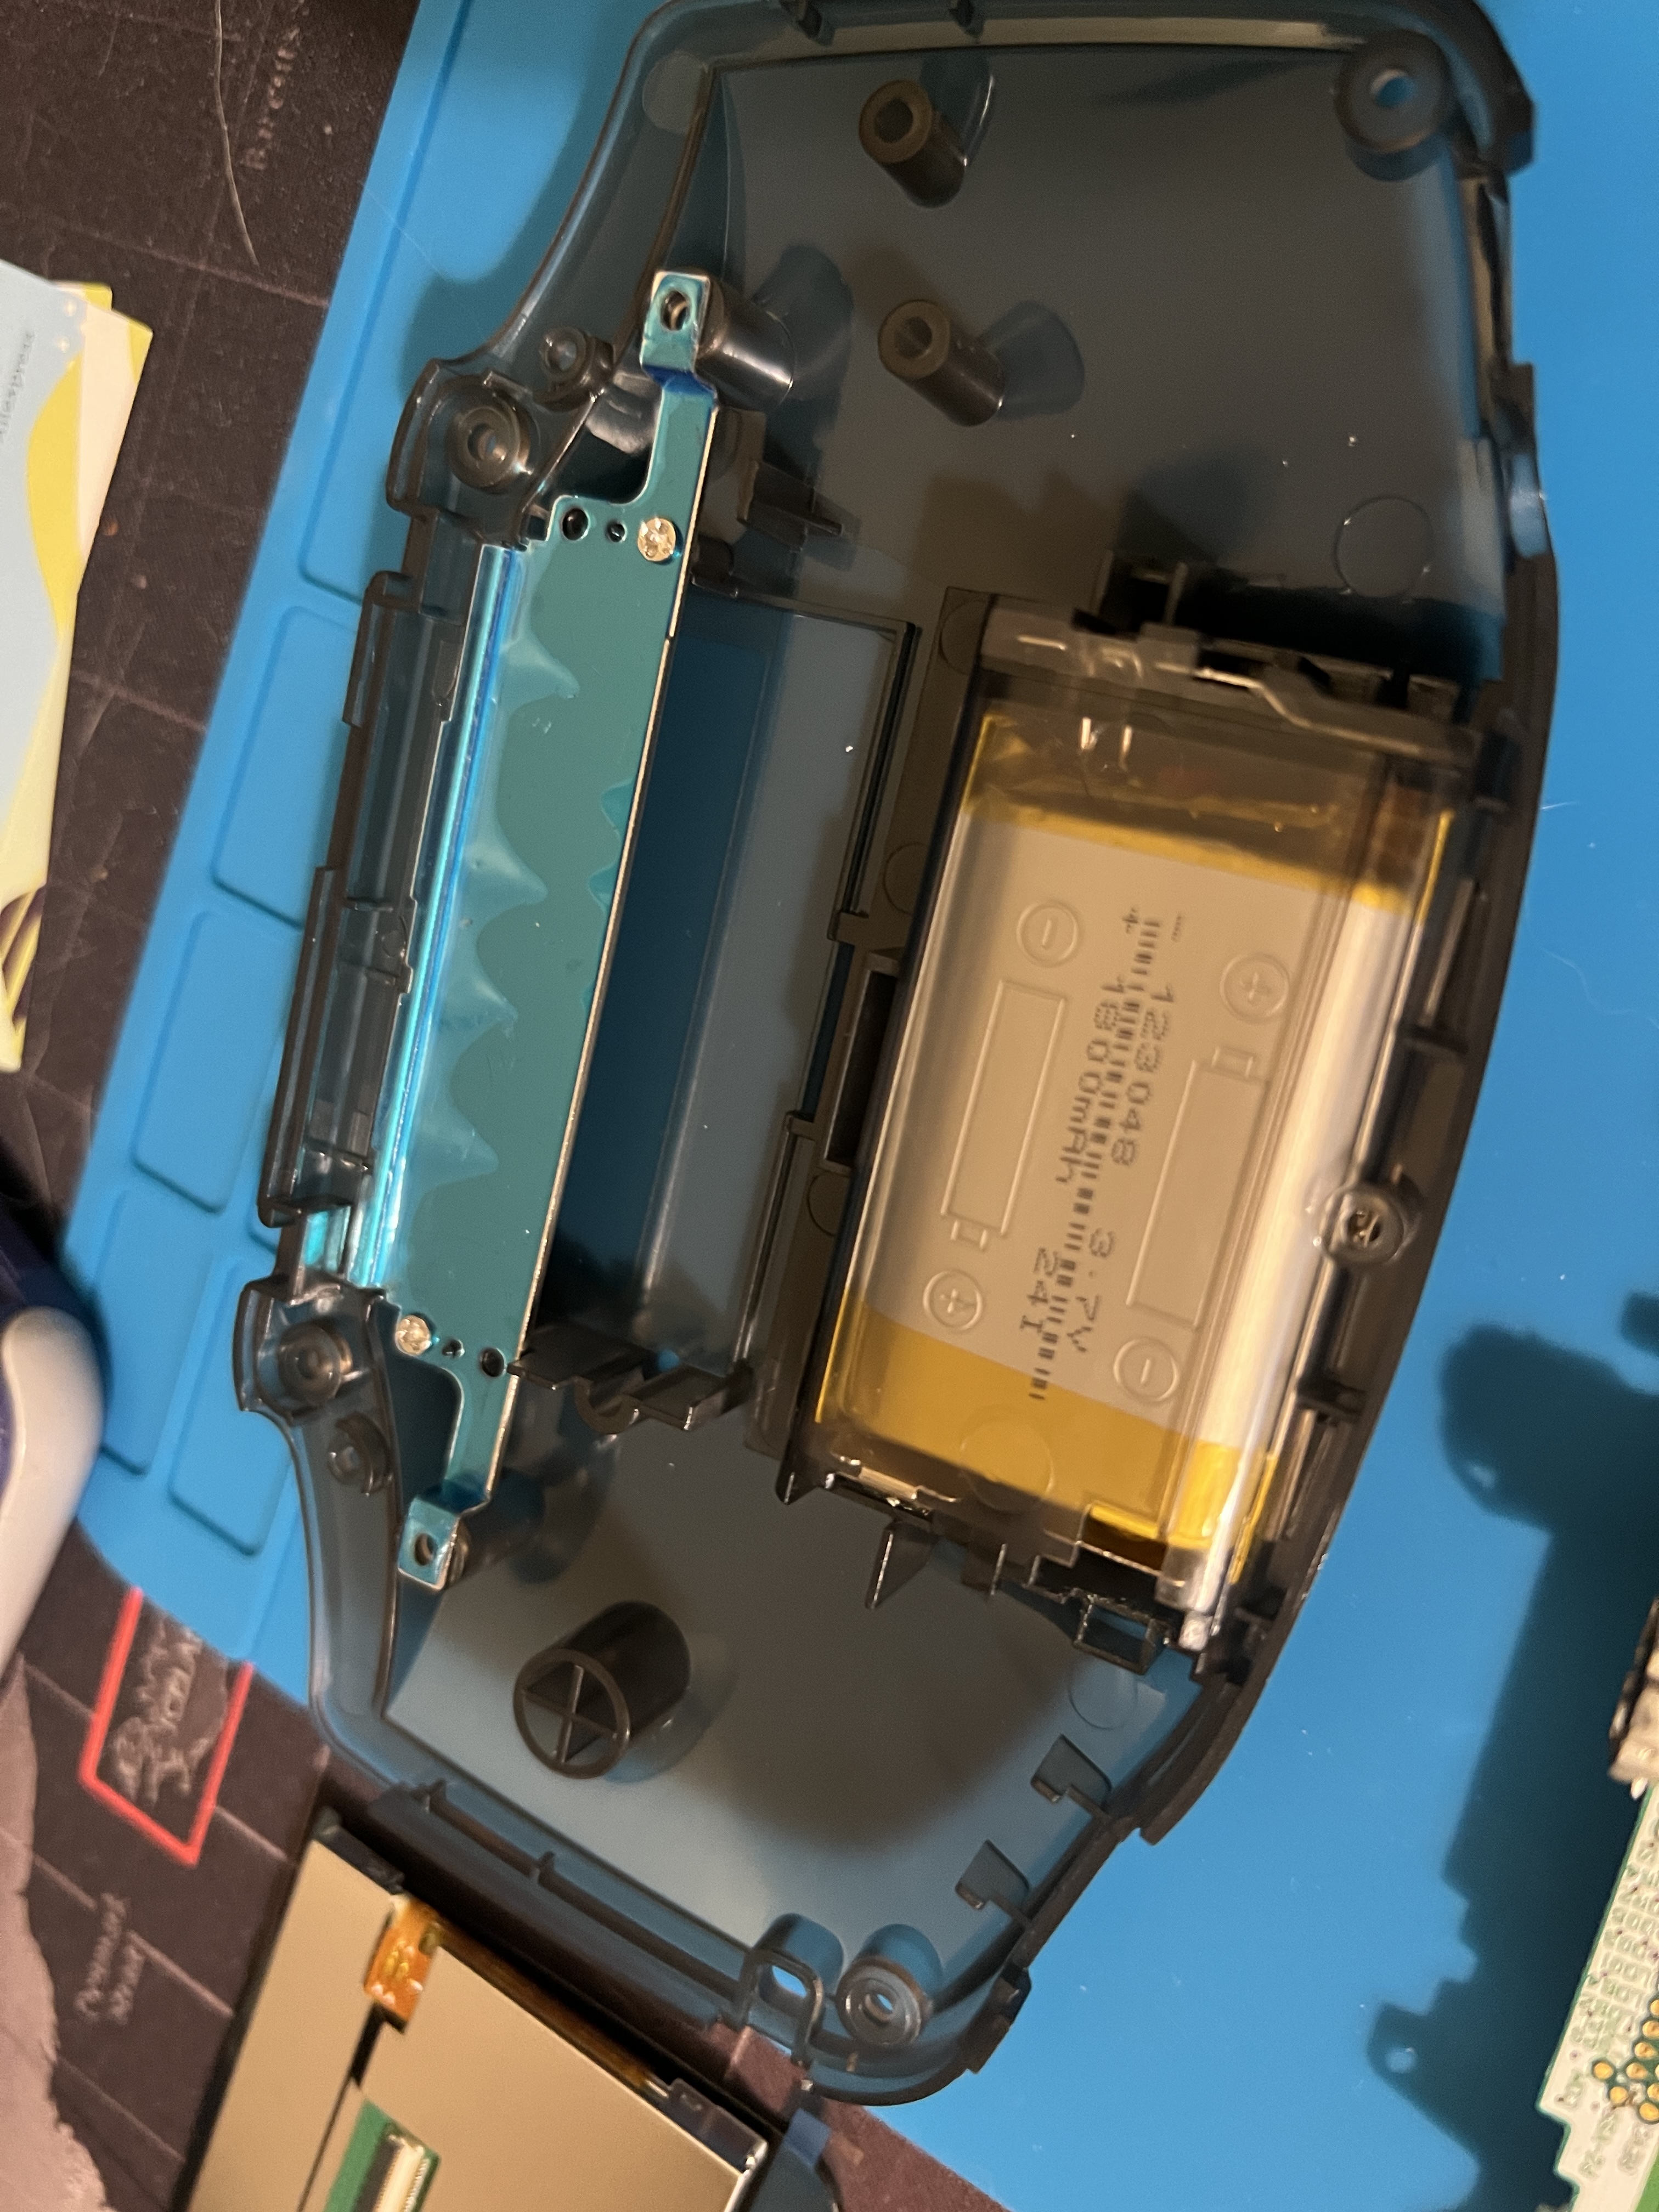
One of the biggest quality-of-life improvements was switching from AA batteries to a rechargeable lithium battery. No more constantly changing batteries, and the shell even came with a precut USB port for easy charging. I was all set for modern power with classic gameplay.
Check out the new battery compartment.
Putting the Pieces Together: Testing in the New Shell
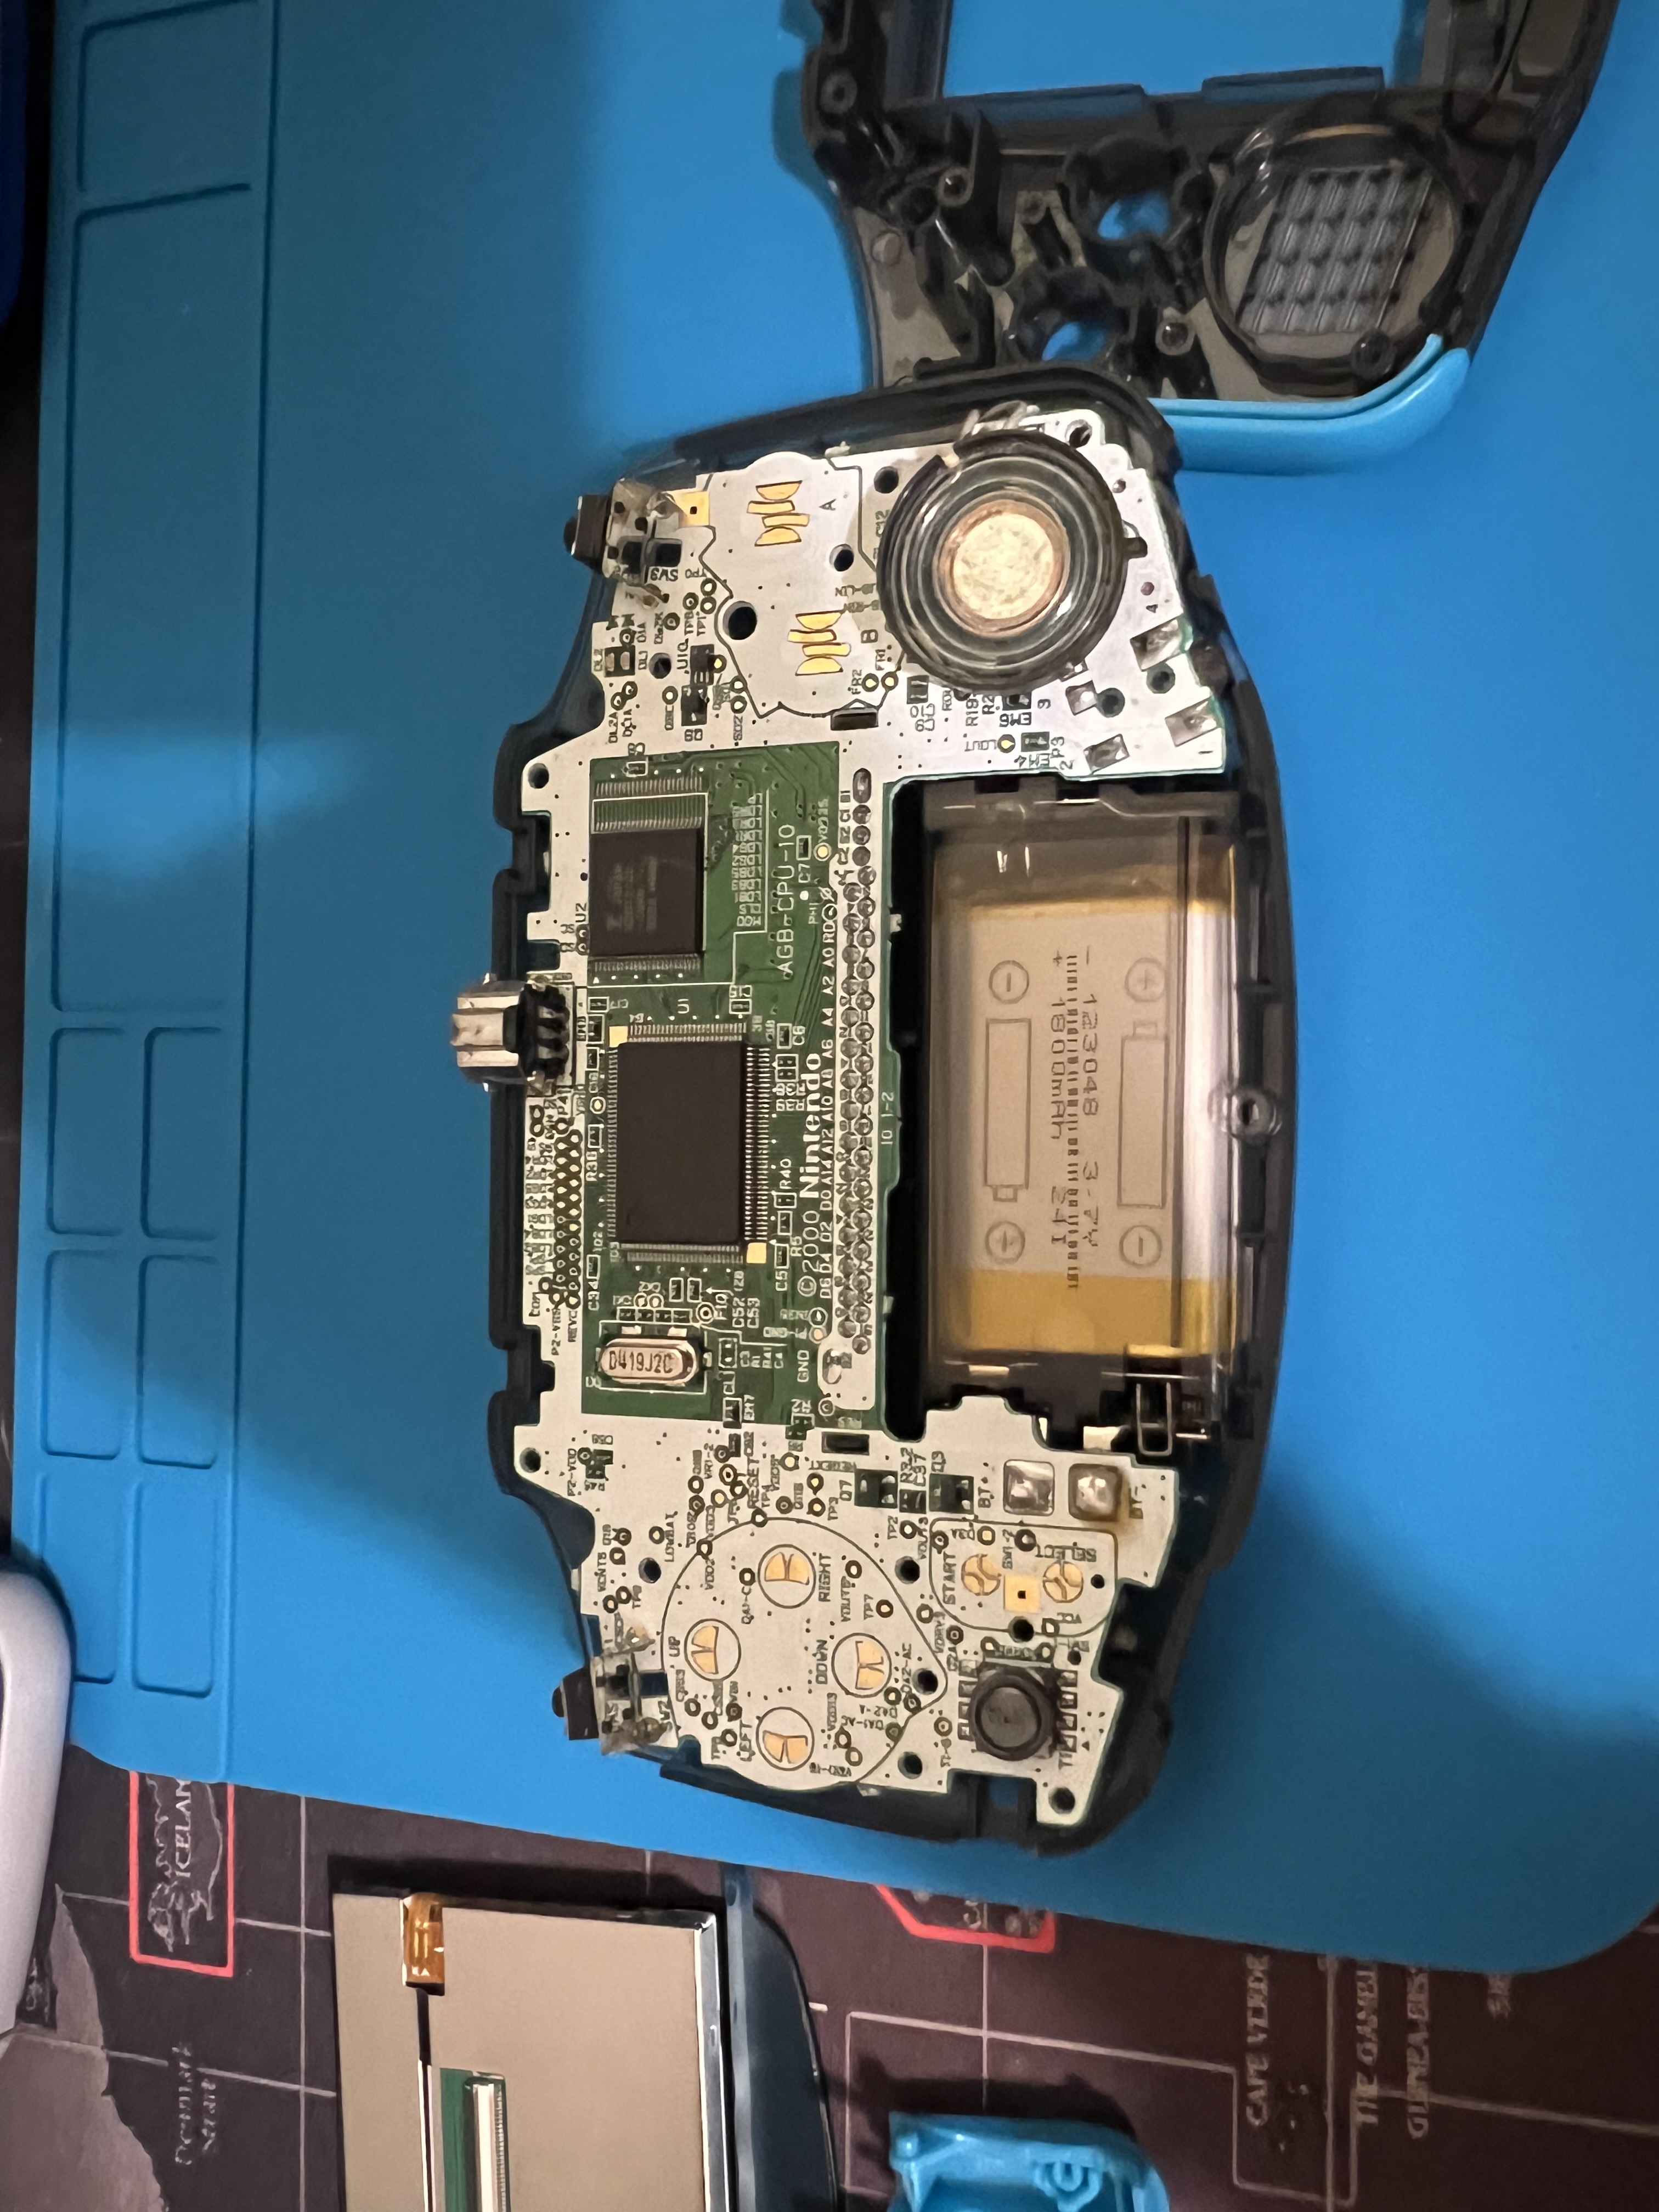
Once I had everything in place, I tested the motherboard inside the new shell. Things were coming together nicely, the screen and buttons felt great, and I was excited to see it all work.
The Screen Upgrade: IPS LCD for Crisp Graphics
Now for the biggest upgrade: the new IPS LCD screen. This screen makes a world of difference, with 9-to-1 pixel upscaling that makes the visuals sharp and bright. It’s a massive improvement over the original dim display, and the adjustable brightness means I can play anywhere, even in low light.
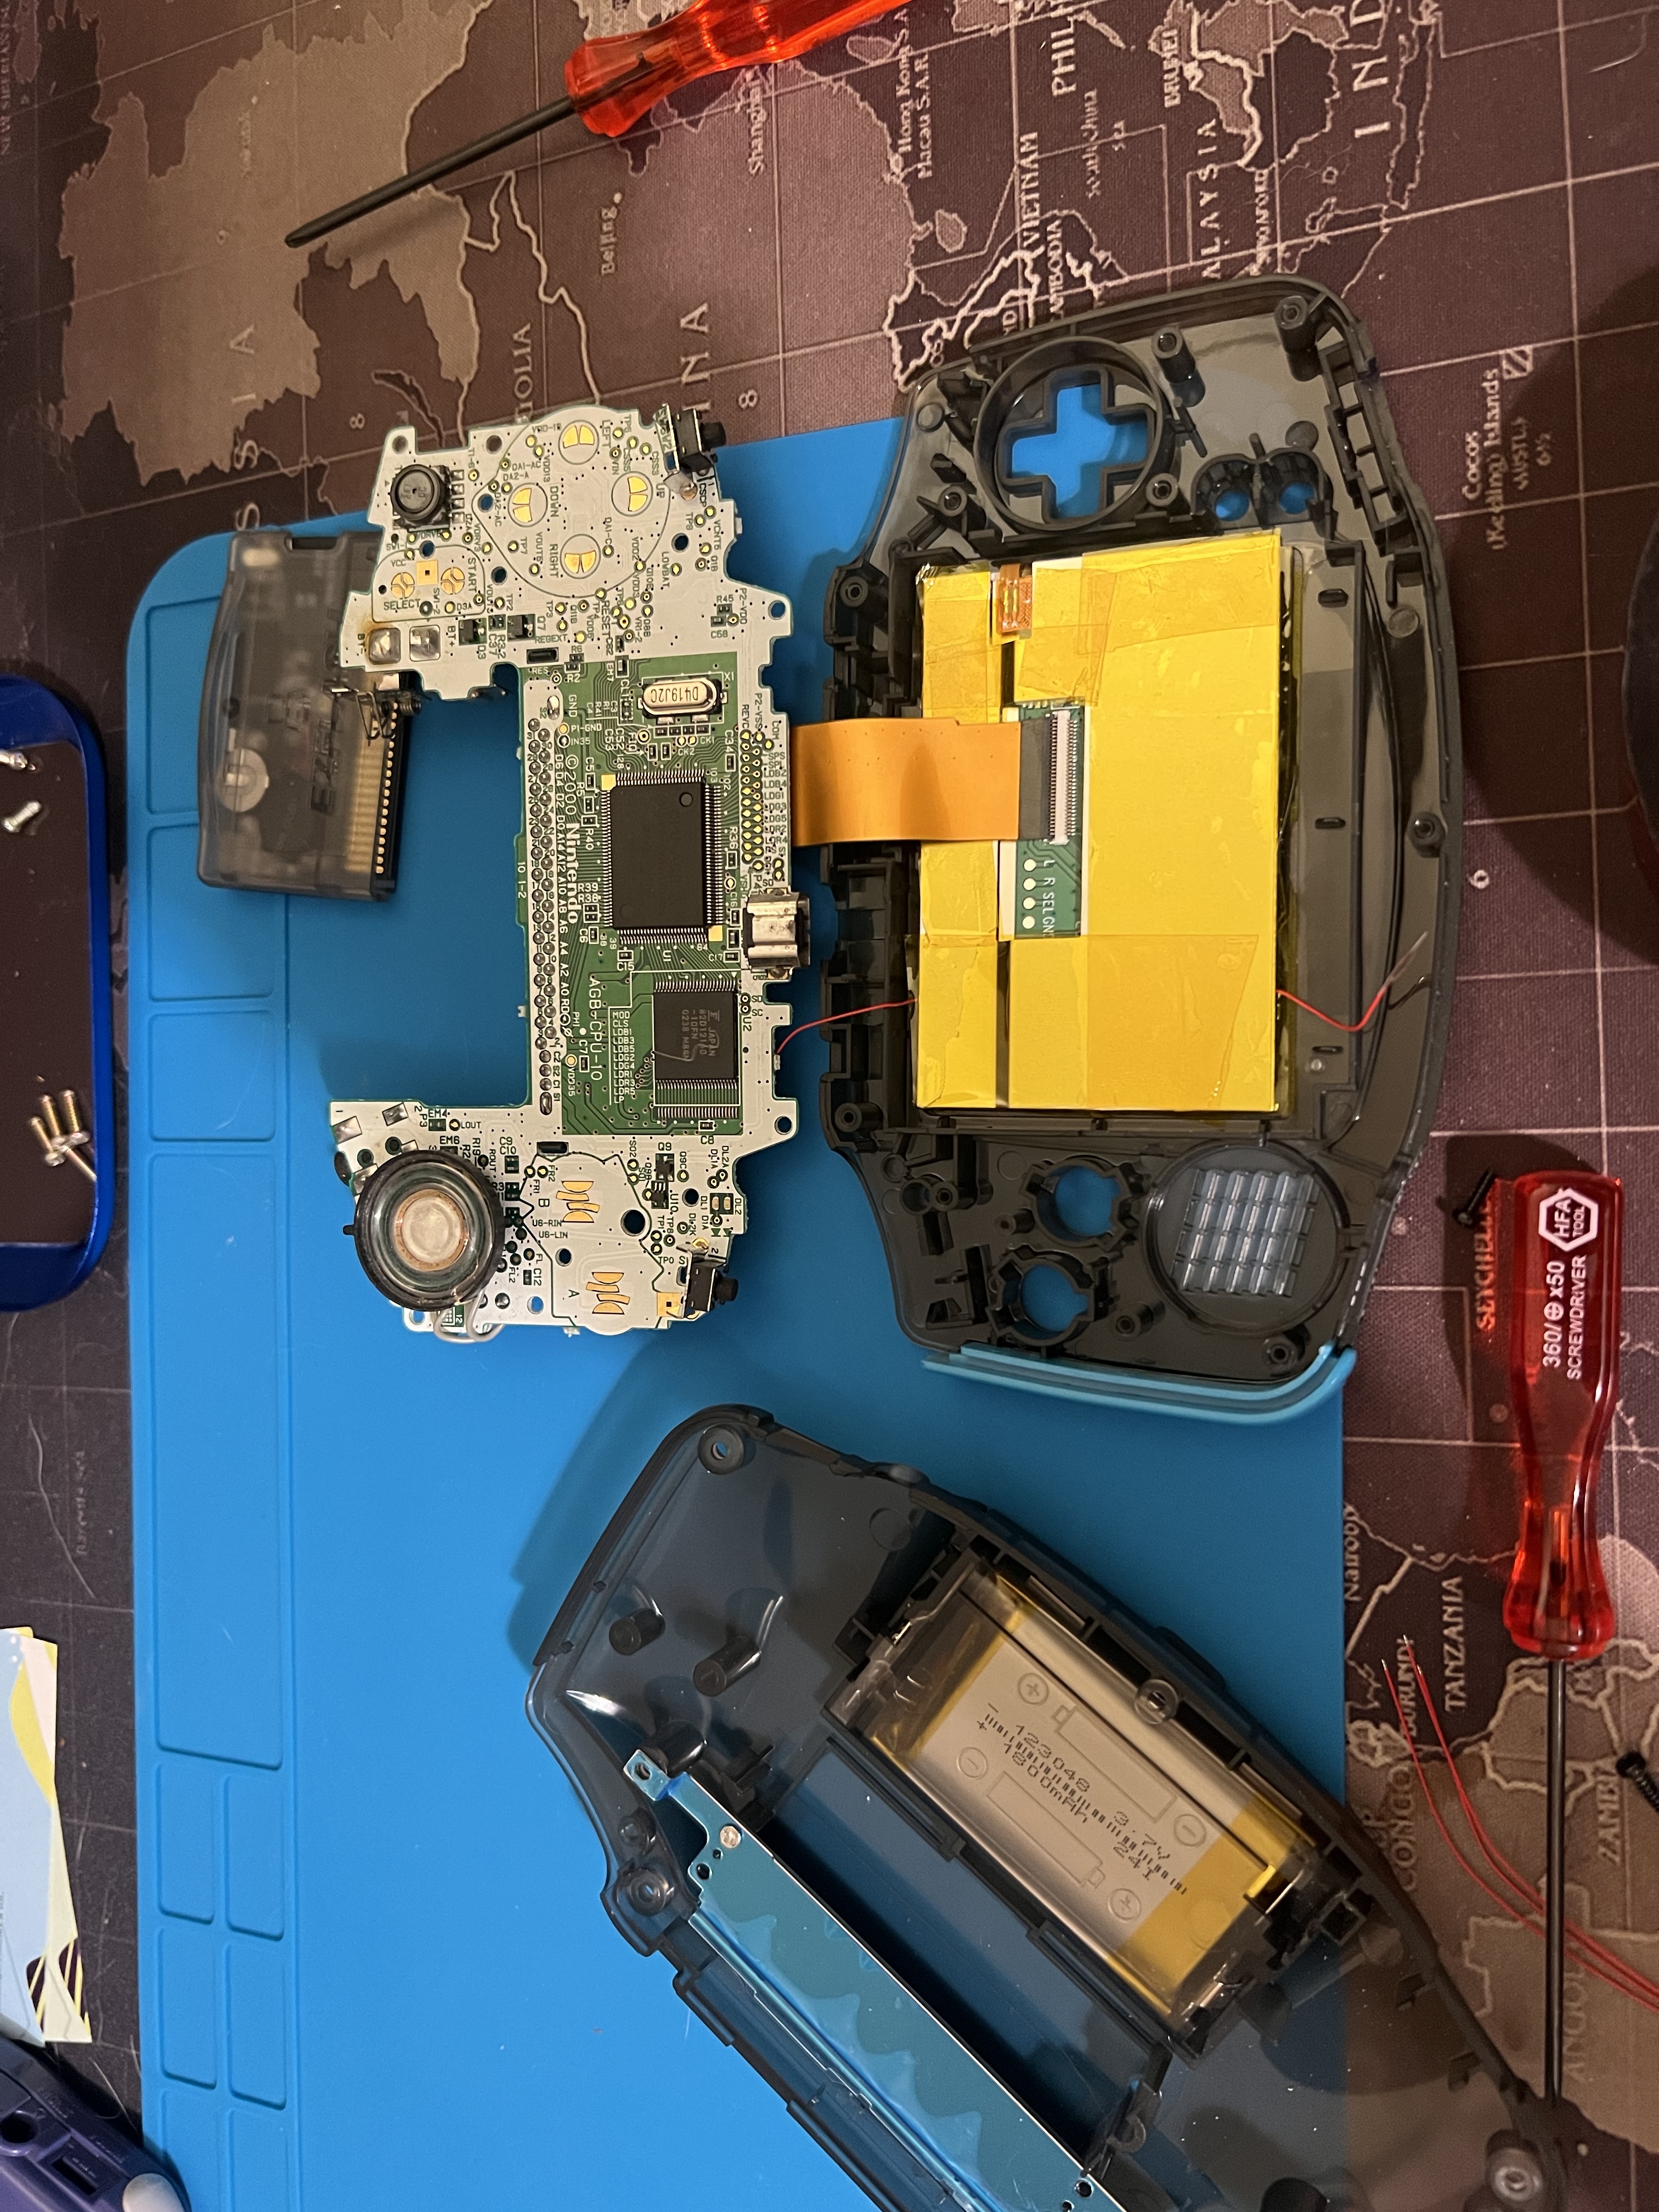
Here’s the screen installed and connected to the motherboard.
The EZFLASH OMEGA DE: All My Games in One Place
What’s an upgraded GBA without some serious gaming? To complete the project, I added an EZFLASH OMEGA DE. With this flash cart, I’ve got all my favorite ROMs in one place: Gameboy Advance, Gameboy Color, and Gameboy classics. No more carrying around cartridges, and I’ve got instant access to my entire retro library.
The Finished Product: A Retro Beast
And here it is, the final result: a fully modernized Gameboy Advance that still holds onto its retro charm. The transparent grey shell with blue buttons looks stunning, the screen is a huge upgrade, and the lithium battery means I can game without worrying about power.
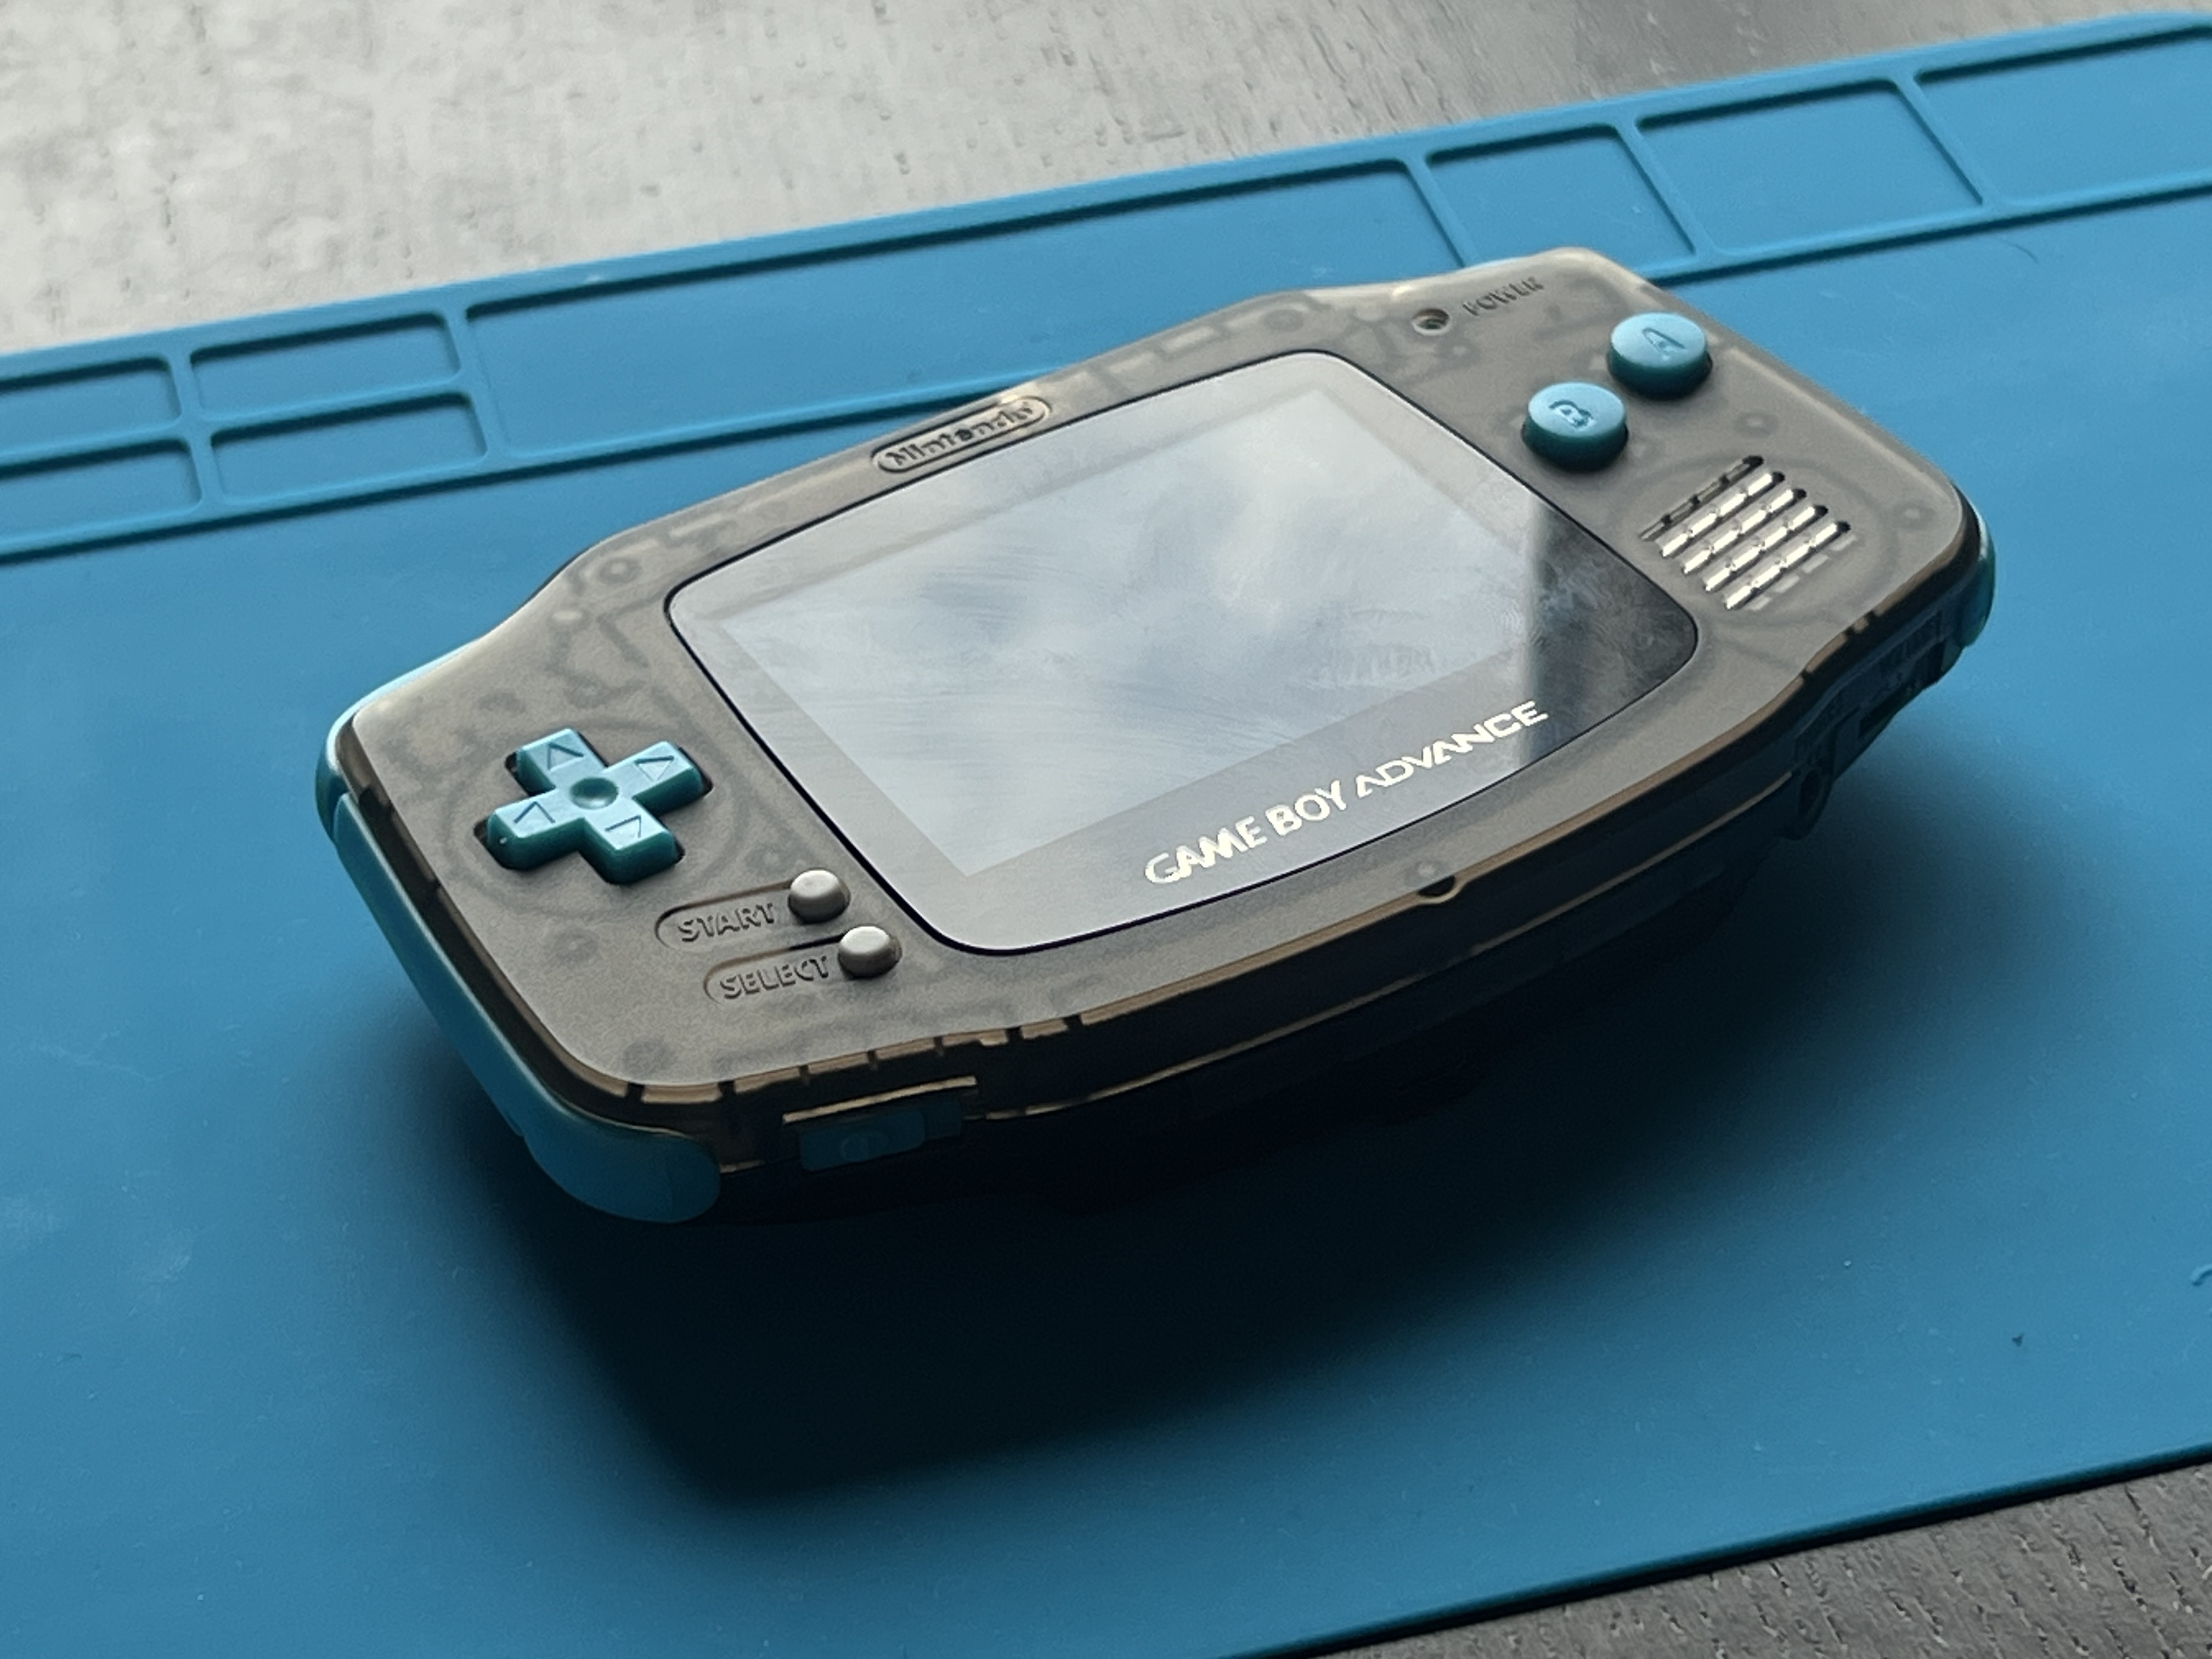
Finally, here’s the glory shot: GBA powered on, with that iconic GameBoy Advance intro screen lighting up the IPS display. It’s like stepping back in time, but with a much better view!
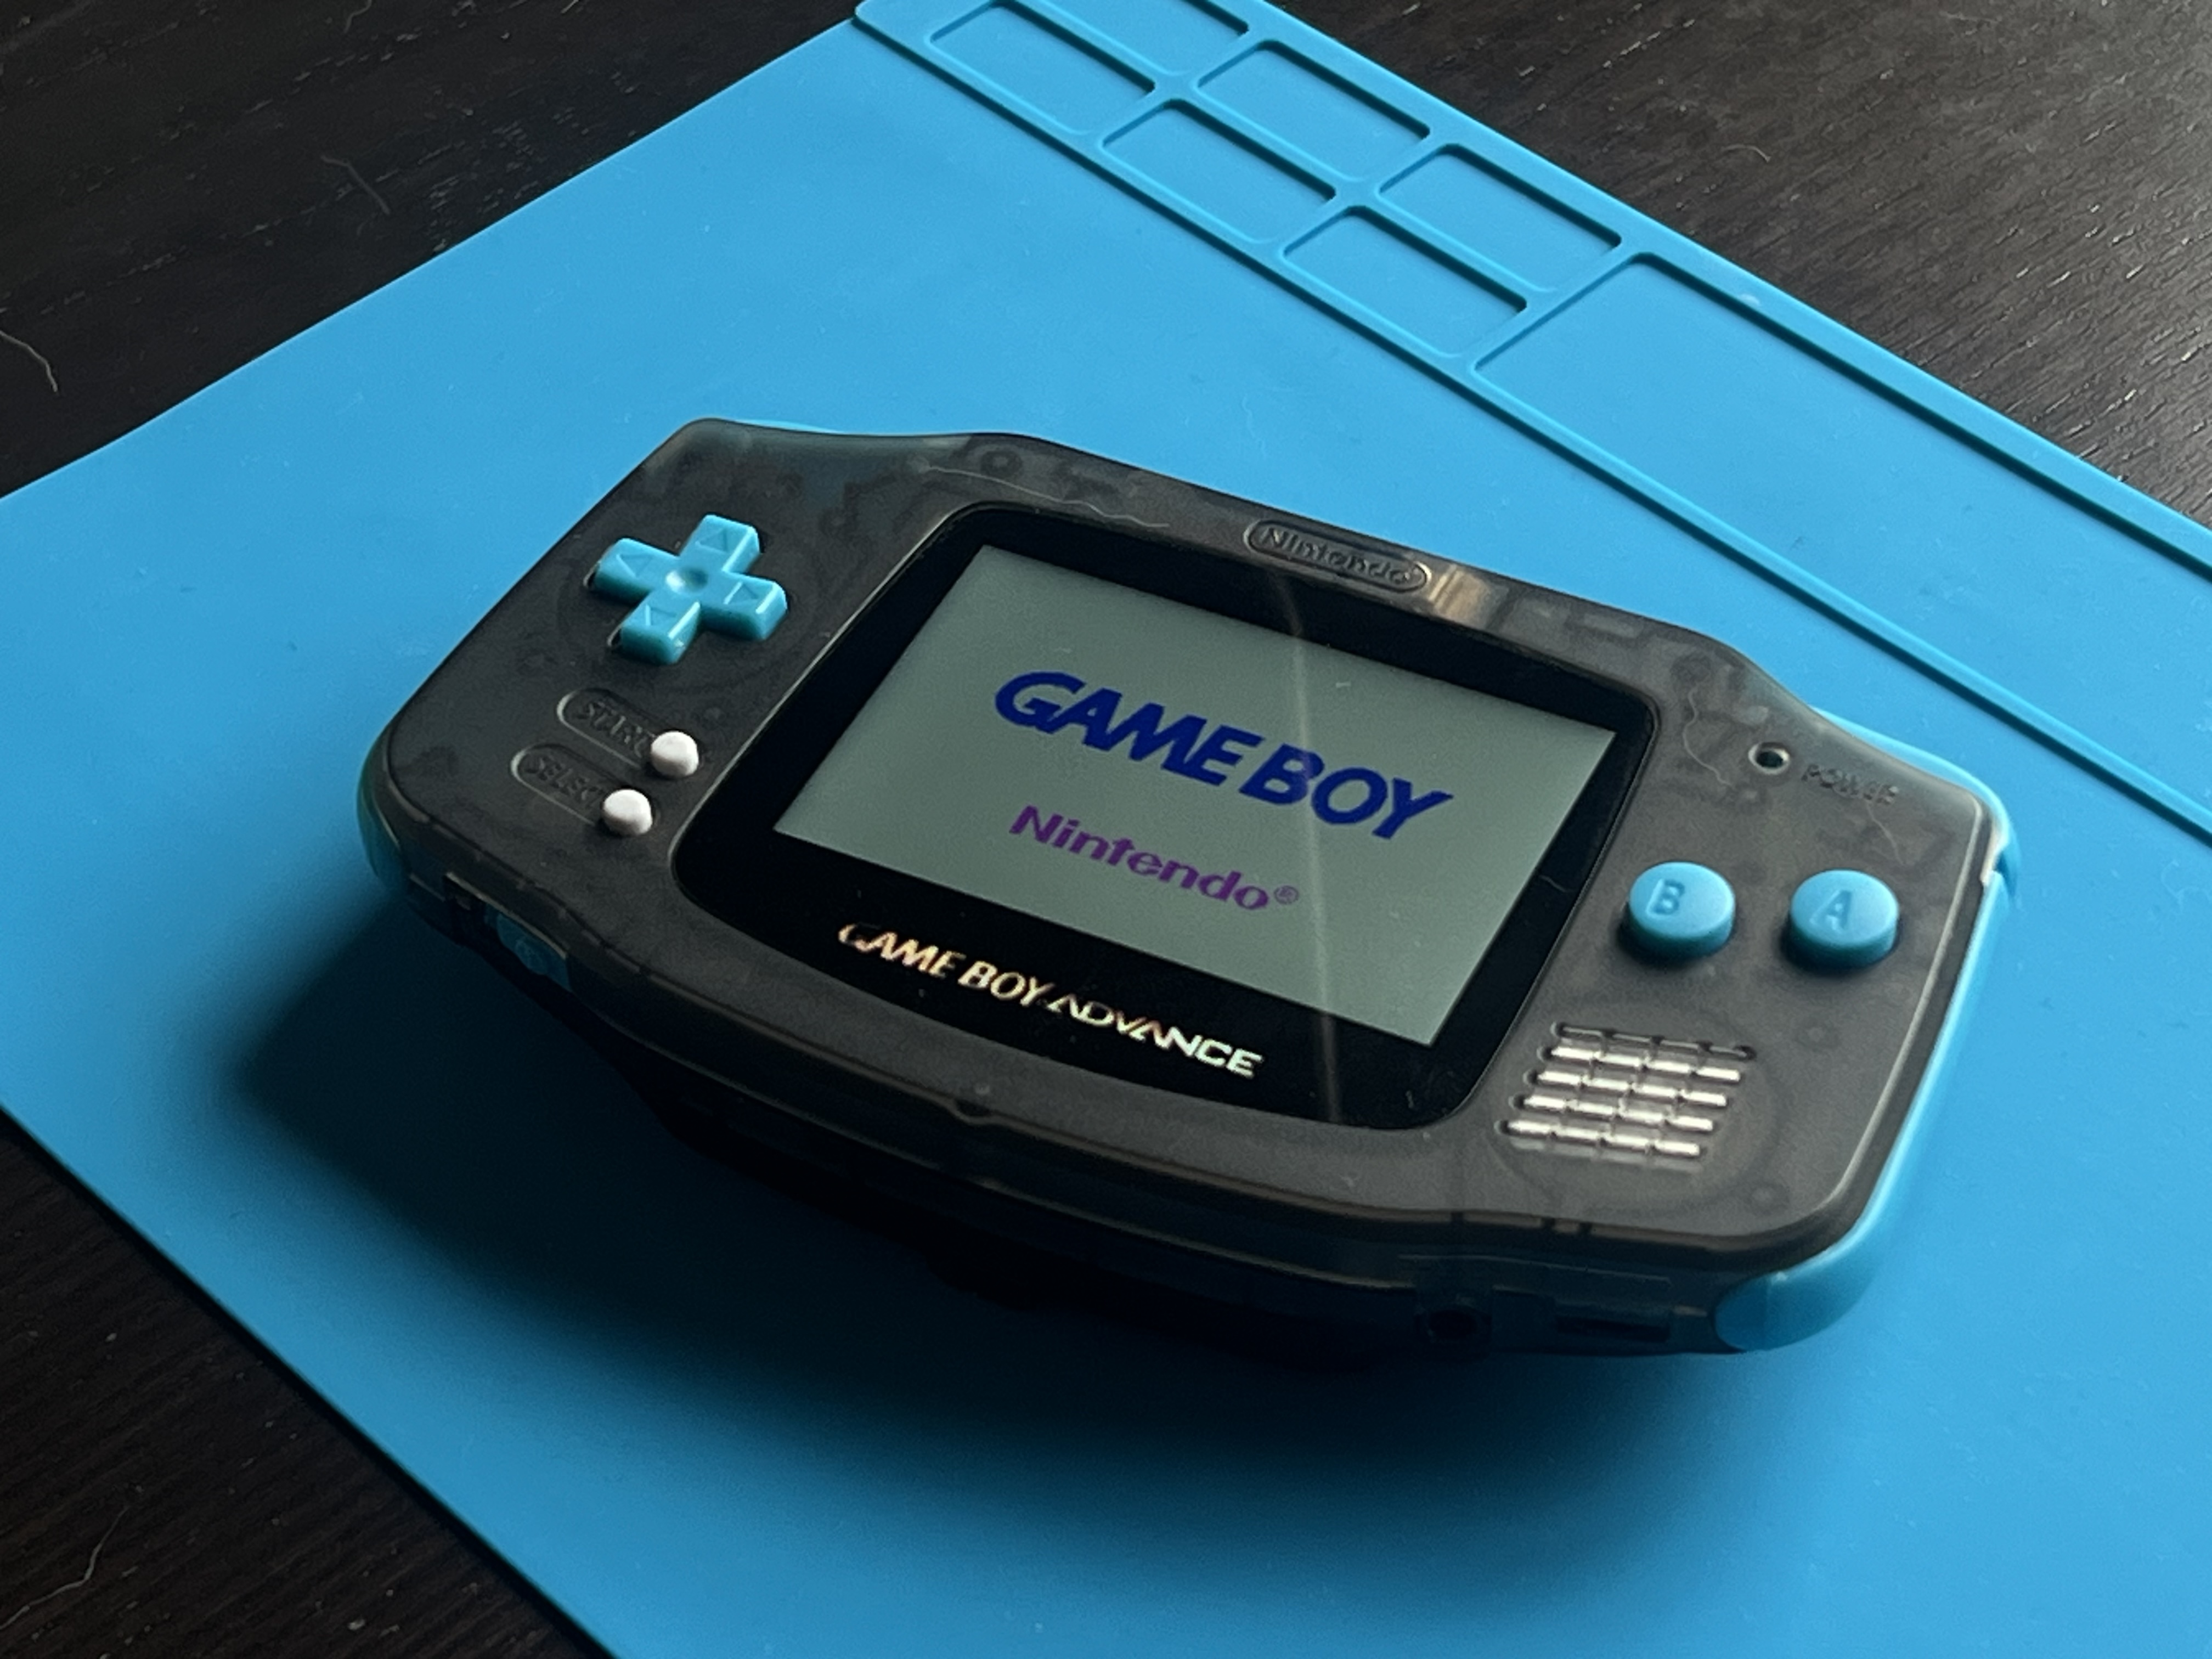
This whole project was a blast, and I couldn’t be happier with how it turned out. If you’ve got an old GBA lying around, upgrading it is definitely worth it. Now I can relive my favorite games like Metroid Fusion and Pokémon on a device that’s ready for the future.
finally upgraded the gba. paid 1 euro for it back in school, colleague was literally about to throw it in the trash. loved it for years but the shell was scratched up and the screen was dim, time to fix it
cracked it open
motherboard time machine vibes
board fully out. simple little thing but it did a lot
cpu closeup for the nerds. this chip ran all my childhood games
new shell: transparent grey with blue buttons. came precut for the bigger ips screen so no cutting for me 👌
also ditched the AAs for a rechargeable lithium battery. shell even has a precut usb port for charging. no more battery swaps ever
test fit in the new shell, screen and buttons feel great
the big one: ips lcd, 9-to-1 pixel upscaling, adjustable brightness. massive difference vs the old dim display, can play in the dark now
topped it off with an ezflash omega de. gba + gameboy color + gameboy roms all on one cart, whole retro library, no cartridges to carry
done. looks so good
boot screen on the new display 🤌
metroid fusion and pokemon here i come. do this to your old gba, worth it
I bought my Gameboy Advance for one euro from a school colleague who was about to throw it away. Years later, with a scratched shell and a dim screen, it earned a proper upgrade: nostalgic design outside, modern tech inside.
Teardown
First, the original shell came apart.
Opening it up exposed the motherboard. Taking it apart felt like stepping into a time machine.
I removed the board carefully. The internals are remarkably simple for how much they do.
A close-up of the CPU, for the hardware nerds. This little chip powered most of my favorite childhood games.
New Shell
The replacement is a transparent grey shell with blue buttons, a good mix of retro and modern. Better still, it came precut for the larger IPS screen, so no cutting was needed on my end.
Lithium Battery
The biggest quality-of-life win: swapping AA batteries for a rechargeable lithium battery. The shell includes a precut USB port for charging, so no more battery swaps.
Assembly
With everything in place, I tested the motherboard inside the new shell. Screen and buttons both felt great.
IPS Screen
The headline upgrade is the IPS LCD with 9-to-1 pixel upscaling: sharp, bright, and adjustable, so I can play anywhere. A massive improvement over the original dim display.
EZFLASH OMEGA DE
To finish, I added an EZFLASH OMEGA DE flash cart. It holds my whole retro library in one place: Gameboy Advance, Gameboy Color, and Gameboy classics, with no cartridges to carry.
Result
A fully modernized GBA that keeps its retro charm. The grey shell with blue buttons looks stunning, the screen is a huge step up, and the lithium battery means power is never a worry.
The glory shot: powered on, with the GameBoy Advance intro screen on the new IPS display.
The project was a blast. If you have an old GBA lying around, upgrade it. Metroid Fusion and Pokémon have never looked better.
I’ve always loved my Gameboy Advance (GBA), but after years of faithful service, it was time to take things to the next level. What makes this story particularly compelling is the origin: I purchased this handheld for just 1 single euro from an old colleague in school who was about to throw it into the trash. It’s important to note that this project isn’t just a repair, it’s a transformation, one that seamlessly blends nostalgic design with modern technology. In this post, we’ll delve into exactly how I turned an old-school relic into a robust, portable powerhouse.
Starting with the Old: Shell and Motherboard
To kick things off, I carefully disassembled the GBA’s original shell. As much as I appreciated the classic design, the scratched-up exterior and dim screen were begging for an upgrade. Whether you’re a seasoned modder or a curious beginner, teardown is where every restoration journey truly begins.
Once I had it open, I got a clear look at the motherboard. Taking apart my GBA felt like stepping into a time machine, offering a fascinating glimpse into the handheld gaming landscape of a bygone era. But this was just the start of the journey.
Next, I carefully removed the motherboard from its housing. It’s genuinely remarkable to see how simple yet powerful these internal components are, a testament to elegant, efficient, and enduring engineering. Here’s the motherboard fully out of the shell.
For all the hardware nerds out there, here’s a close-up shot of the CPU. It’s incredible to think that this unassuming little chip powered so many of my favorite games growing up. It isn’t just silicon, it’s the beating heart of countless childhood memories.
A Fresh New Look: Transparent Grey Shell with Blue Buttons
With the teardown complete, it was time to delve into the aesthetic side of the equation. I swapped the old shell for a transparent grey one with blue buttons, a choice that strikes a seamless balance between retro vibes and modern style. The best part? This shell came precut for the larger IPS screen, allowing me to leverage a ready-made solution and saving me the hassle, the risk, and the mess of modifying it myself.
Here’s a shot of the motherboard next to the new shell, ready to be reunited.
Ditching the AA Batteries: Lithium Power
It’s important to note that one of the biggest quality-of-life improvements in this entire project was switching from disposable AA batteries to a rechargeable lithium battery. No more constantly changing batteries, no more interrupted sessions, no more waste. The shell even came with a precut USB port for easy charging, delivering a truly seamless charging experience. With this in place, I was all set for modern power with classic gameplay.
Check out the new battery compartment below.
Putting the Pieces Together: Testing in the New Shell
With every component in place, the next crucial step was testing the motherboard inside the new shell. Things were coming together nicely: the screen looked great, the buttons felt responsive, and the anticipation of seeing it all work was palpable.
The Screen Upgrade: IPS LCD for Crisp Graphics
Now we arrive at the centerpiece of the transformation: the new IPS LCD screen. This screen makes a world of difference, featuring 9-to-1 pixel upscaling that renders visuals remarkably sharp, bright, and vivid. It’s a massive improvement over the original dim display, and the adjustable brightness means I can play anywhere, whether it’s a sunlit park bench or a dimly lit room.
Here’s the screen installed and connected to the motherboard.
The EZFLASH OMEGA DE: All My Games in One Place
What’s an upgraded GBA without some serious gaming to match? To complete the project, I added an EZFLASH OMEGA DE. With this robust flash cart, I’ve got all my favorite ROMs consolidated in one place: Gameboy Advance, Gameboy Color, and Gameboy classics. No more carrying around a bag of cartridges; instead, I can leverage instant access to my entire retro library. It isn’t just convenience, it’s freedom.
The Finished Product: A Retro Beast
And here it is, the final result: a fully modernized Gameboy Advance that still holds onto its retro charm. The transparent grey shell with blue buttons looks stunning, the screen represents a huge upgrade, and the lithium battery means I can game without ever worrying about power.
Finally, here’s the glory shot: the GBA powered on, with that iconic GameBoy Advance intro screen lighting up the IPS display in all its glory. It’s like stepping back in time, but with a much better view!
At the end of the day, this whole project was an absolute blast, and I couldn’t be happier with how it turned out. If you’ve got an old GBA lying around gathering dust, upgrading it is definitely worth the investment of time and effort. Whether you’re chasing nostalgia, exploring the world of hardware modding, or simply looking for a fun weekend project, this restomod delivers on every front. Now I can relive my favorite games like Metroid Fusion and Pokémon on a device that’s truly ready for the future.
🎮 In today’s fast-paced world of disposable technology, where gadgets are discarded almost as quickly as they’re unboxed, there’s something profoundly magical, dare I say transformative, about breathing new life into a beloved classic. Have you ever held a piece of your childhood in your hands and wondered what it could become? Today, dear reader, I’m beyond thrilled to take you on an unforgettable journey: the complete, no-compromises modernization of my Gameboy Advance (GBA).
But first, let’s set the stage. This isn’t just any handheld console. This is a device I purchased for just 1 single euro, yes, you read that correctly, one euro, from an old colleague in school who was moments away from throwing it into the trash. One person’s trash truly is another person’s treasure, and what a treasure it turned out to be. What follows is a rich tapestry of nostalgia, engineering, and pure retro joy.
Why does this matter, you ask? Because in an ever-evolving technological landscape, projects like this remind us of three timeless truths: that great design never goes out of style, that sustainability and passion can walk hand in hand, and that the devices we love deserve second chapters. Whether you’re a die-hard retro enthusiast, a curious tinkerer taking your very first steps into the world of hardware modding, or simply someone who fondly remembers the warm glow of a handheld screen under the bedcovers, this journey is for you. So grab your favorite beverage, settle in, and let’s embark on this adventure together!
Starting with the Old: A Deep Dive into Shell and Motherboard 🔧
Every great transformation begins with a single step, and mine began with carefully disassembling the GBA’s original shell. As much as I cherished that iconic design, let’s be honest with ourselves: the scratched-up exterior and dim screen were absolutely begging, pleading, yearning for an upgrade.
It’s important to note, and I truly cannot stress this enough, that patience is the unsung hero of any successful teardown. Rushing this stage is a recipe for stripped screws, broken clips, and broken hearts. Take your time. Breathe. Savor the process.
Once I had it open, I was greeted by the star of the show: the motherboard. Taking apart my GBA felt like stepping into a time machine, a portal to a simpler era of gaming excellence. But make no mistake, this was just the beginning of our adventure.
Next came the delicate, almost ceremonial process of removing the motherboard. Isn’t it absolutely remarkable how simple yet powerful these internal components are? It’s a masterclass in elegant engineering. Behold, the motherboard fully liberated from its shell:
And now, a special treat for all the hardware nerds out there (you know who you are! 🤓): a glorious close-up of the CPU. Take a moment to truly appreciate this. It’s genuinely mind-blowing to think that this humble little chip powered so many of my favorite games growing up. This isn’t just silicon and solder; it’s the beating heart of a generation’s childhood memories.
A Fresh New Look: The Shell Revolution 💅
With the teardown complete, it was time to delve into the aesthetic renaissance of this project. I swapped the tired old shell for a breathtaking transparent grey one with blue buttons, a design choice that masterfully weaves together retro vibes and modern style into one seamless visual experience. And here’s the game-changer, the cherry on top of this already delicious cake: this shell came precut for the larger IPS screen, completely eliminating the hassle, stress, and risk of modifying it myself. Talk about a win-win!
Feast your eyes on this shot of the motherboard next to its new home, ready to be reunited in perfect harmony:
Ditching the AA Batteries: The Lithium Power Revolution ⚡
Now, let’s talk about what might just be the single biggest quality-of-life improvement in this entire odyssey. Are you tired of constantly buying batteries? Frustrated by mid-game power failures? I certainly was. Let’s take a moment to reflect on the humble AA battery: a faithful companion, yes, but also a relentless drain on both wallet and planet. In a world increasingly focused on sustainability, clinging to disposable batteries in 2024 simply doesn’t make sense. That’s why switching from AA batteries to a rechargeable lithium battery was nothing short of a game-changer:
- Freedom from disposables: No more constantly changing batteries, ever again.
- Modern convenience: The shell even came with a precut USB port for effortlessly easy charging.
- The best of both worlds: Modern power seamlessly married to classic gameplay.
Check out this stunning new battery compartment:
Putting the Pieces Together: The Moment of Truth 🧩
With every component lovingly placed, the time had come for the moment every modder knows and loves: testing the motherboard inside its magnificent new shell. And let me tell you, things were coming together beautifully. The screen dazzled, the buttons felt absolutely sublime, and the excitement of seeing it all work was practically electric.
The Screen Upgrade: IPS LCD Magnificence ✨
Drumroll, please, because now we arrive at the undisputed crown jewel of this transformation: the new IPS LCD screen. Where do I even begin? This screen doesn’t just make a difference; it makes a world of difference:
- 9-to-1 pixel upscaling: Visuals so sharp and bright they practically leap off the display.
- A massive leap forward: A night-and-day improvement over the original dim display.
- Adjustable brightness: Play anywhere, anytime, even in low light. The world is your gaming oasis.
Here’s the glorious screen installed and connected to the motherboard:
The EZFLASH OMEGA DE: A Universe of Games in the Palm of Your Hand 🎯
What’s an upgraded GBA without some serious gaming firepower to match? To bring this masterpiece across the finish line, I added the legendary EZFLASH OMEGA DE. This isn’t just a flash cart; it’s a portal to an entire universe of retro gaming:
- Gameboy Advance classics? Check. ✅
- Gameboy Color favorites? Check. ✅
- Gameboy originals? Check. ✅
No more lugging around a mountain of cartridges. Instead, I now enjoy instant, frictionless access to my entire retro library, all in one magnificent place. Truly a game-changer in every sense of the word.
The Finished Product: A Retro Beast Is Born 🏆
And here it is, ladies and gentlemen, the moment we’ve all been waiting for: the final result. A fully modernized Gameboy Advance that still holds tightly onto its irreplaceable retro charm. The transparent grey shell with blue buttons looks absolutely stunning, the screen is a monumental upgrade, and the lithium battery means I can game to my heart’s content without a single worry about power.
And finally, the pièce de résistance, the glory shot to end all glory shots: the GBA powered on, with that iconic GameBoy Advance intro screen lighting up the IPS display in radiant splendor. It’s like stepping back in time, but with a much, much better view!
Conclusion: The Journey Continues 🌅
In conclusion, this whole project was an absolute blast from start to finish, and I genuinely couldn’t be happier with how it turned out. But more than that, it was a reminder that with a little patience, a little passion, and a lot of love, we can rescue the treasures of our past and carry them boldly into the future.
So what are the key takeaways from this incredible adventure? Let’s recap:
- A one-euro rescue: Sometimes the greatest treasures are hiding in plain sight, one conversation away from the trash bin.
- Modern meets retro: A transparent grey shell, blue buttons, an IPS LCD, and lithium power prove that old and new can coexist beautifully.
- All the games, all the time: The EZFLASH OMEGA DE transforms one humble handheld into an entire gaming library.
If you’ve got an old GBA lying around, gathering dust in a forgotten drawer, hear me now: upgrading it is definitely, unquestionably, absolutely worth it. Now I can relive my favorite games like Metroid Fusion and Pokémon on a device that isn’t just ready for the future, it IS the future.
Thank you, truly and deeply, for joining me on this incredible journey. Until next time, keep gaming, keep tinkering, and never stop believing in second chances, for consoles and for ourselves. 🎮✨👋